| Author: | |
| Website: | |
| Page title: | |
| URL: | |
| Published: | |
| Last revised: | |
| Accessed: |
The SimpleEncryption program works by scrambling the characters of a message so that the resulting encrypted version of the message cannot be read. Each printable character in the original message is represented by some other character that is randomly selected from the first 127 characters of the Unicode character encoding scheme (characters 0-127 form the Basic Latin character set).
Each unique character in the original message is represented by one (and only one) Unicode character. When the message is saved, the program creates two files. The first file (with the extension .enc) contains the encrypted message. The second file (with the extension .key) contains the contents of the 127-character array chrCodeKeyArray() that was dynamically created and used to encode the message.
Note that whereas older single byte character set (SBCS) encoding schemes used one byte to encode each character, Unicode (which can currently represent up to 65,533 characters) uses a variable-length character encoding. This means that the size of each file created by the program (in bytes) will usually be somewhat larger than the number of characters it contains, since some of the characters used for encoding will be represented by more than one byte.
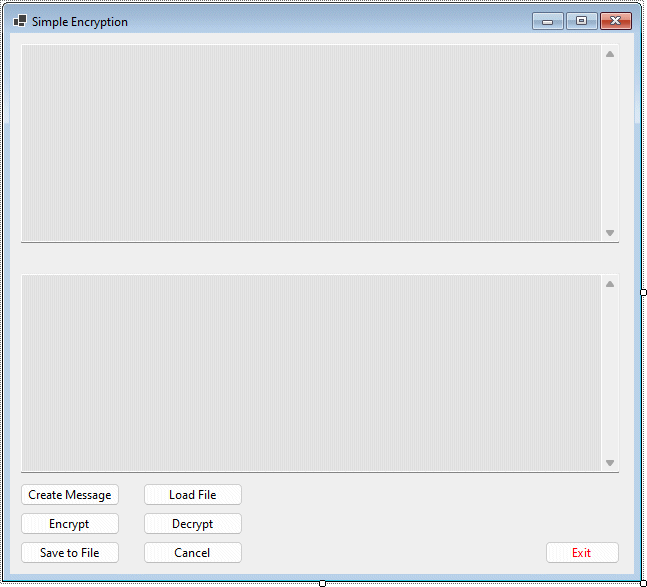
The Simple Encryption program interface
| Control | Name | Additional Properties |
|---|---|---|
| Form | frmEncryption | Size: 640, 580 Text: "Simple Encryption" |
| TextBox | txtMessage | BackColour: ControlLight Location: 10, 10 Multiline: True ReadOnly: True ScrollBars: Vertical Size: 600, 200 TabStop: False |
| TextBox | txtEncoded | BackColour: ControlLight Location: 10, 240 Multiline: True ReadOnly: True ScrollBars: Vertical Size: 600, 200 TabStop: False |
| Button | cmdCreate | Location: 10, 450 Size: 100, 23 Text: "Create Message" |
| Button | cmdLoad | Location: 133, 450 Size: 100, 23 Text: "Load File" |
| Button | cmdEncrypt | Enabled: False Location: 10, 479 Size: 100, 23 Text: "Encrypt" |
| Button | cmdDecrypt | Enabled: False Location: 133, 479 Size: 100, 23 Text: "Decrypt" |
| Button | cmdSave | Enabled: False Location: 10, 508 Size: 100, 23 Text: "Save to File" |
| Button | cmdCancel | Enabled: False Location: 133, 508 Size: 100, 23 Text: "Cancel" |
| Button | cmdExit | ForeColor: Red Location: 535, 508 Size: 75, 23 Text: "Exit" |
| SaveFileDialog | sfdEncFile | - |
| OpenFileDialog | ofdEncFile | - |
The application has two text boxes - one to accept user input to enable the user to type in the message they want to encrypt (and to display the plain text version of any decrypted messages), and the other to display the encrypted version of the message.
Text boxes are used for both input and output because they permit the use of scroll bars. This enables the message to break over any number of lines and still be readable. The input text box and the various command buttons are only enabled when their use is appropriate.
In the version of the application provided here, the maximum number of characters allowed for a message is limited to 1024 (somewhat arbitrarily), but this number could be increased. Note however that the encoding and decoding process will take longer as the size of the message increases.
Dim intMaxLength As Integer = 1024
Dim chrCodeKeyArray(127) As Char
Dim strKeyFileName As String
Dim boolMsgFlag As Boolean = False
The integer variable intMaxLength is used by the form's Load event to set the maximum number of characters that can be typed into the input text box by the user, and could be set to a higher value if longer messges were required. The character array chrCodeKeyArray() is used to hold the characters that have been substituted for the characters in the original message.
The replacement character for each character typed by the user is randomly selected from the first 127 Unicode characters using a simple encoding algorithm, and placed in the array at the position normally occupied by the original character in the Unicode Basic Latin (positions 0-127) character set.
txtMessage.MaxLength = intMaxLength
cmdCreate.Focus()
The above code executes when the application starts and simply sets the maximum number of characters that the user can enter to whatever the value iof intMaxLength is (we have set this to 1024) and gives the focus to the cmdCreate button.
txtMessage.ReadOnly = False
txtMessage.BackColor = Color.White
txtMessage.Clear()
txtEncoded.Clear()
txtMessage.Focus()
cmdLoad.Enabled = False
cmdCreate.Enabled = False
cmdCancel.Enabled = True
This code is executed when the Create Message button is clicked, and enables the input text box to be used for text input by setting its ReadOnly property to False (when the program loads, it is initially set to True). It draws the user's attention to the fact that the text box is now active by changing its background colour to white, gives it the focus (evidenced by a flashing cursor in the top left-hand corner) and clears any pre-existing text from both text boxes.
The Create Message and Load File buttons (the only buttons initially enabled) are now both disabled, and the Cancel button is enabled. The user may now either enter some text, or cancel the operation. We will first deal with the former option.
If Len(txtMessage.Text) > 0 And txtMessage.ReadOnly = False Then
If boolMsgFlag = False Then
boolMsgFlag = True
cmdEncrypt.Enabled = True
End If
Else
boolMsgFlag = False
cmdEncrypt.Enabled = False
End If
This block of code uses the Boolean variable boolMsgFlag to keep track of whether there is actually a message to encrypt. All the time this is the case, then the Encrypt button will be enabled. If the message length becomes zero (because the user has deleted any text entered using the backspace key, for example), then the Encrypt button is disabled once more.
There is of course always the possibility that the user will cancel the operation by clicking on the Cancel button, so we need to provide code to deal with this event. Before we write the event handler however, we will create a function to clear down the program's variables and reset the interface to its original state.
Private Sub Clear()
txtMessage.Clear()
txtEncoded.Clear()
For i = 0 To Len(chrCodeKeyArray) - 1
chrCodeKeyArray(i) = ""
Next
cmdDecrypt.Enabled = False
cmdCancel.Enabled = False
txtMessage.ReadOnly = True
txtMessage.BackColor = SystemColors.ControlLight
cmdSave.Enabled = False
cmdCreate.Enabled = True
cmdLoad.Enabled = True
cmdCreate.Focus()
End Sub
Not too much in the way of explanation should be needed for this bit of code. It clears the contents of both text boxes, clears the character array chrCodeKeyArray(), and sets the program's display back to its original state. The procedure is defined separately (rather than within the Cancel button's Click event handler) because we will also be calling it from another part of the program.
Clear()
Private Function Encode(InputChar As Char) As Char
Dim EncodedChar As Char
If chrCodeKeyArray(Asc(InputChar)) = Nothing Then
Randomize()
Do
EncodedChar = Chr(CInt (127 * Rnd()))
Loop Until InStr(CStr (chrCodeKeyArray) , EncodedChar) = 0
chrCodeKeyArray(Asc(InputChar)) = EncodedChar
Return EncodedChar
Else
Return chrCodeKeyArray(Asc(InputChar))
End If
End Function
The local character variable EncodedChar holds the result of the character encoding algorithm. The If . . . statement first checks to see whether the character to be encoded has been encountered already, and if so simply returns the replacement character stored at the original character's normal position within the character array chrCodeKeyArray(). Otherwise, the function generates random replacement characters until it finds one that has not already been used (this is achieved using a Do . . . Loop Until construct whose exit condition is that the randomly generated character is not already in the array). Once it has achieved this goal, the successful candidate is stored in the appropriate location within the array and a copy of the value is returned by the function.
Dim strTemp As String = ""
For i = 0 To Len(txtMessage.Text) - 1
If Asc(txtMessage.Text(i)) > 126 Or Asc(txtMessage.Text(i)) < 32 Then
strTemp &= Encode(" ")
Else
strTemp &= Encode(txtMessage.Text(i))
End If
Next
txtEncoded.Text = strTemp
cmdEncrypt.Enabled = False
txtMessage.ReadOnly = True
txtMessage.BackColor = SystemColors.ControlLight
cmdSave.Enabled = True
The string variable strTemp declared in the first line is used to store the output from the encryption algorithm and build the encoded message. The code loops through the text message one character at a time, calling the Encode() function to encode each character. If the character entered by the user is (for whatever reason) not one of the printable characters found in the basic ASCII character set, then a space character is encoded in its place.
Once the input string has been encoded, the event handler assigns the encoded string to the Text property of the application's second text box (txtEncoded). It then disables the Encrypt button, sets the ReadOnly property of the input text box to True, and sets the BackColor property of the input text box back to its initial colour to draw the user's attention to the fact that the input box is currently disabled once more.
The last line in the event handler code enables the Save to File button so that the user can save the encypted message if they wish to (the only other option at this stage being to cancel the whole operation). The code for saving the encrypted message is relatively straightforward, and uses the services of the SaveFileDialog control sfdEncFile.
sfdEncFile.Filter = "Encrypted Files|*.enc"
If sfdEncFile.ShowDialog = DialogResult.OK Then
My.Computer.FileSystem.WriteAllText(sfdEncFile.FileName, txtEncoded.Text, False)
strKeyFileName = Mid(sfdEncFile.FileName, 1, Len(sfdEncFile.FileName) - 4) & ".key"
My.Computer.FileSystem.WriteAllText(strKeyFileName, chrCodeKeyArray, False)
Clear()
End If
The first line of code here sets the SaveFileDialog control's filter so that files are saved with the .enc file extension by default (we have chosen to use this file extension to indicate that the file contains encrypted data). If the user has entered a filename and clicked OK, the rest of the code (defined within the If . . . End If block) will execute.
The first line in this block simply writes the encoded message to the file designated by the user (if the file already exists, any existing contents are over written). The next line uses the string variable strKeyFileName to create the filename for the encryption key file. It does this by stripping off the file extension from the encrypted message's filename, and adding a new file extension (.key) to it. The character array chrCodeKeyArray() is then written into a second file with this new filename.
This process will occur transparently from the user's point of view, although they will obviously be able to see the .key file if they examine the contents of the folder where the encrypted files are stored (a further refinement to the program might be to make the .key files hidden).
The final line of code calls the Clear() procedure to set the program variables and user interface back to their original state. We obviously need to be able to retrieve the contents of encrypted files and decrypt them at some point, so there is a bit more code yet to write.
ofdEncFile.Filter = "Encrypted Files|*.enc"
If ofdEncFile.ShowDialog = DialogResult.OK Then
txtEncoded.Text = My.Computer.FileSystem.ReadAllText(ofdEncFile.FileName)
txtMessage.Clear()
strKeyFileName = Mid(ofdEncFile.FileName, 1, _
Len(ofdEncFile.FileName) - 4) & ".key"
chrCodeKeyArray = My.Computer.FileSystem.ReadAllText(strKeyFileName)
cmdCancel.Enabled = True
cmdDecrypt.Enabled = True
cmdCreate.Enabled = False
cmdLoad.Enabled = False
End If
Once again we set up the file filter in the first line of code, this time so that the OpenFileDialog control ofdEncFile will only display files with the .enc file extension. If the user has selected a file to open and clicked OK, the rest of the code (defined within the If . . . End If block) will execute.
The first line of code in this block reads the contents of the encrypted file and assigns them to the Text property of the text box txtEncoded. The second line of code clears the contents (if any) of the input text box. The filename for the .key file is derived in exactly the same way as for the Save to File button's event handler, and is then used to open the .key file and assign its contents to the character array chrCodeKeyArray().
The remainder of the code is concerned with enabling the Cancel and Decrypt buttons, and disabling the Create Message and Load File buttons. The last significant piece of program code we need to write is the code that will decrypt the message and display its contents.
For i = 0 To Len(txtEncoded.Text) - 1
txtMessage.Text &= Chr(InStr(chrCodeKeyArray, txtEncoded.Text(i)) - 1)
Next
cmdCancel.Enabled = False
cmdDecrypt.Enabled = False
cmdCreate.Enabled = True
cmdLoad.Enabled = True
Decryption is a relatively straightforward matter, since all we have to do essentially is to use the contents of chrCodeKeyArray() as a lookup table in order to decode each character in the encrypted message. The code loops through the encrypted message one character at a time, retrieves the original character represented by each encrypted character from the array, and adds it to the text output for the text box txtMessage.
The remainder of the code simply disables the Decrypt and Cancel buttons, and re-enables the Create Message and Load File buttons. The final piece of code required is for the Exit button, which will presumably cause you no problems! The screenshots below show the completed program in operation.
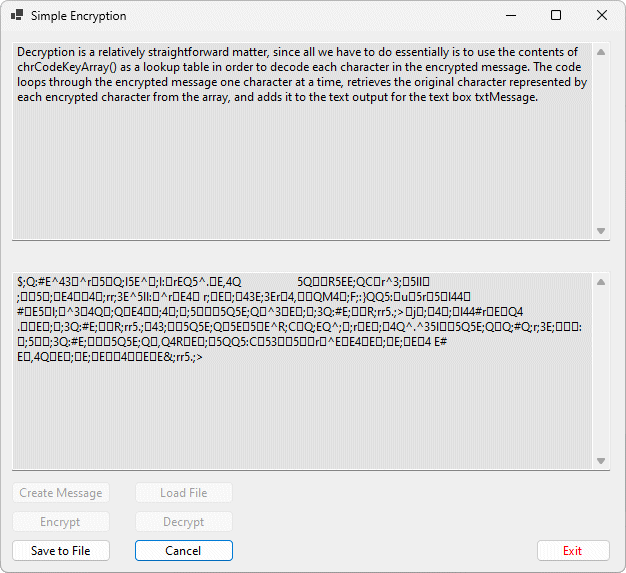
A message has been encrypted
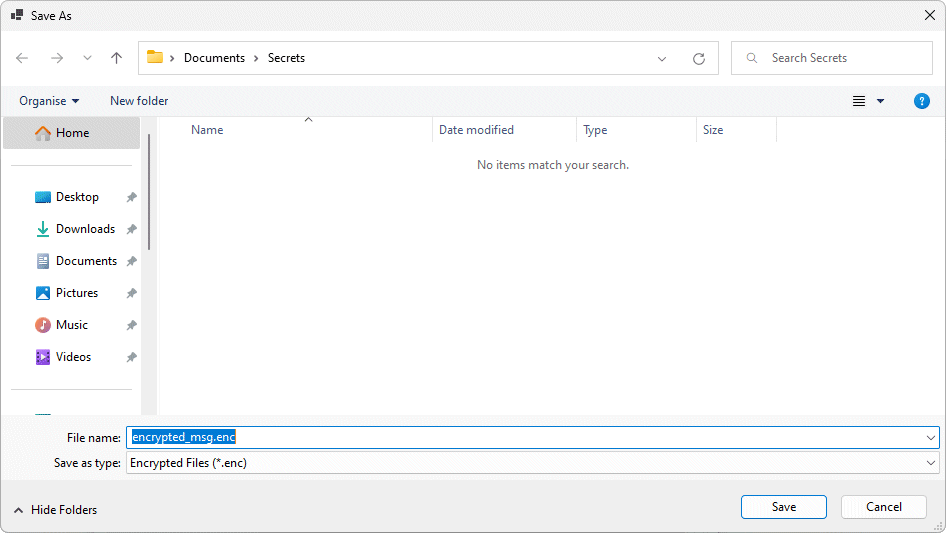
The message will be saved as "encrypted_msg.enc" in the "Secrets" folder
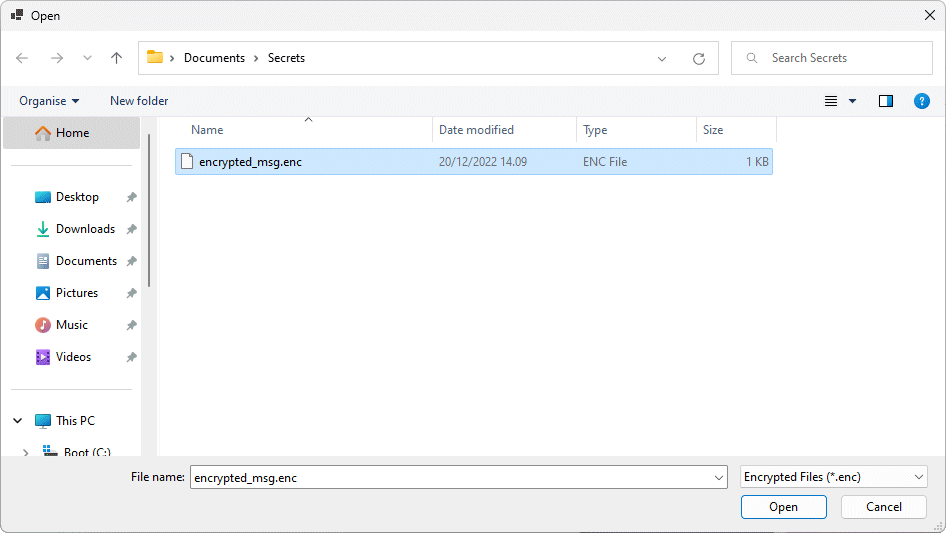
We can now open the encrypted file again
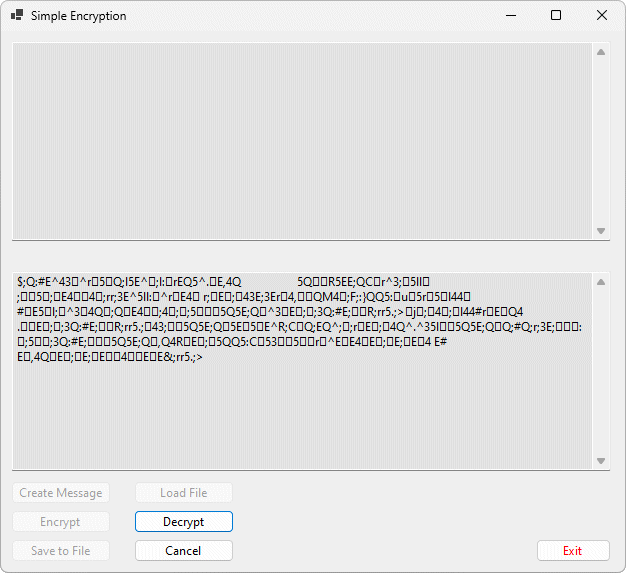
The encrypted file contents are displayed ...
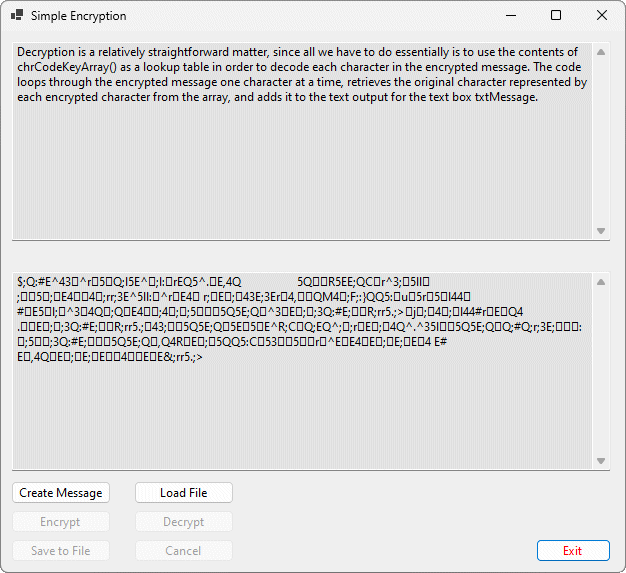
... and can be decrypted again!
The program uses a relatively simplistic encryption algorithm that just replaces one character with another - a bit like a simple codes you might have used in school to pass secret messages to your friends, in which the letters of the alphabet were replaced by numbers (A = 1, B = 2 and so on).
The algorithm used here is somewhat more sophisticated in that the character substitution is randomly generated for each message, and draws on a much larger pool of replacement characters. Even so, any encryption expert worth their salt would probably be able to decipher all but the shortest of messages during their coffee break, even in the absence of a key, so I am not expecting a job offer from the NSA!
This program would however serve to hide sensitive information (passwords or bank account details for example) from a casual observer who has somehow gained access to your files. A far more interesting way of encrypting information is (or soon will be) described elsewhere in this section, where we show you how to create a program that encodes information into an image file.