| Author: | |
| Website: | |
| Page title: | |
| URL: | |
| Published: | |
| Last revised: | |
| Accessed: |
Event-driven programming is a programming paradigm based on the concept of responding to events that occur in real time, like the user clicking on a button, pressing a key on the keyboard, or scrolling up and down. JavaScript can detect such events using event listeners, and reacts to each occurrence of an event using an event handler. In order to do so, JavaScript must interact with the nodes of the Document Object Model (DOM), which is essentially the application programming interface (API) for HTML and XML documents.
In its Introduction to Events page, MDN describes events as follows:
"Events are things that happen in the system you are programming - the system produces (or "fires") a signal of some kind when an event occurs, and provides a mechanism by which an action can be automatically taken (that is, some code running) when the event occurs. Events are fired inside the browser window, and tend to be attached to a specific item that resides in it. This might be a single element, a set of elements, the HTML document loaded in the current tab, or the entire browser window. There are many different types of events that can occur."
An event is usually triggered (or fired) by a user action such as mouse click or keystroke, or resizing a window. Every event that occurs in the HTML DOM is represented by an event object based on the Event interface, and inherit its properties and methods. Most of these event objects will have additional properties and methods that are specific to the kind of event that has occurred.
JavaScript allows us to write code routines called event handlers. Each event handler will carry out a specific action or series of actions in response to the occurrence of a specific browser event. The browser element that the event is triggered on is called the target of the event, and the process of establishing an association between the event itself and the event handler is called registering an event handler.
When an event occurs, the event object, which contains detailed information about the event that it represents, is passed to the appropriate event handler. In addition to the properties specific to the event itself, every instance of an event object inherits the same basic set of read-only properties from the Event interface. The following table lists those properties and provides a brief description of each:
| Property | Description |
|---|---|
| Event.bubbles |
A boolean value indicating whether or not the event bubbles up through the DOM |
| Event.cancelable |
A boolean value indicating whether the event is cancellable |
| Event.composed |
A boolean value indicating whether or not the event can bubble across the boundary between the shadow DOM and the regular DOM |
| Event.currentTarget |
A reference to the currently registered target of the event (the possibility exists that this property’s value may have been changed through retargeting) |
| Event.defaultPrevented |
A boolean value that Indicates whether or not the event was cancelled by a call to event.preventDefault() |
| Event.eventPhase |
A numerical constant that Indicates which phase of the event is being processed - NONE (0), CAPTURING_PHASE (1), AT_TARGET (2), BUBBLING_PHASE (3). |
| Event.isTrusted |
A boolean value that indicates whether or not the event was initiated by the browser (e.g. following a user click) or by a script |
| Event.target |
A reference to the original target of the event |
| Event.timeStamp |
The time at which the event was created, in milliseconds (current definitions are browser dependent) |
| Event.type |
A string value that identifies the type of the event |
In this article we will be looking at some of the more commonly occurring browser events, and provide examples of how JavaScript might be used to respond to those events. If you would like to see an exhaustive list of the events that can be fired inside a browser window, we suggest you have a look at MDN’s Event Reference page. We will be taking a detailed look at various kinds of events, including the following:
Event handlers are JavaScript functions that receive an event object as their argument and take some action, or series of actions, in order to respond appropriately to that event. There are three main approaches to implementing event handlers. We can use an inline event handler, we can assign event handling code to an event property, or we can create an event listener. We will describe each of these approaches below, and provide examples of their use.
There is also a legacy approach, called the JavaScript pseudo protocol, in which the event handler is associated with a hypertext link by replacing the URI that would normally be assigned to the HTML href attribute with a JavaScript function call. For example, the code below creates an HTML page with a hypertext link and a single paragraph element. A JavaScript function called sayHello() replaces the expected URL in the link’s href attribute, and is executed when the link is clicked.
<!doctype html>
<html lang="en">
<head>
<meta charset="utf-8" />
<title>JavaScript Demo 31</title>
</head>
<body>
<script>
function sayHello() {
document.getElementById("hello").innerHTML = "Hello!";
}
</script>
<a href="JavaScript:sayHello()">Say hello . . .</a>
<p id="hello"></p>
</body>
</html>
Copy and paste this code into a new file in your HTML editor, save the file as javascript-demo-31.html, and open the file in a web browser. Click on the Say Hello . . . link to see what happens. You should see something like this:
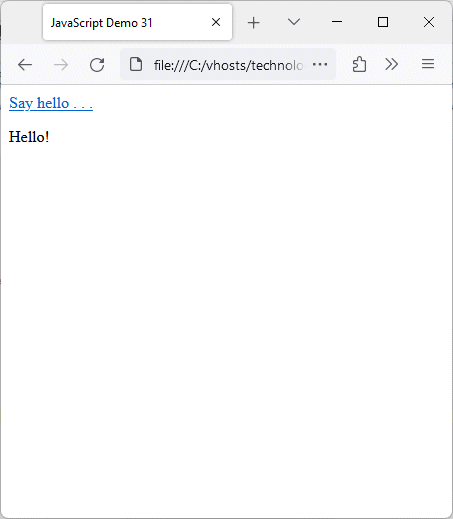
The link’s URL has been replaced by a JavaScript function call
The code is fairly self-explanatory. The function uses the document.getElementById() method to identify the HTML element to be written to (the paragraph element with its id attribute set to hello) and set its innerHTML property (i.e., the contents of the element) to "Hello!"
The pseudo protocol technique still works perfectly well in modern web browsers, but its use is frowned upon and it should be avoided. If JavaScript has been disabled by the user, or the JavaScript function itself does not load for some reason, the result is effectively a broken link (it won’t crash your page, but nothing will happen).
Let’s move on now to inline event handlers. The earliest technique used to register event handlers involved the use of event handler HTML attributes whereby the attribute value is a call to a JavaScript function that implements the event handler code. One of the most frequently encountered examples is the ubiquitous onClick attribute typically found on the HTML <button> element. The following code creates a web page that demonstrates two ways of implementing an inline event handler:
<!doctype html>
<html lang="en">
<head>
<meta charset="utf-8" />
<title>JavaScript Demo 32</title>
</head>
<body>
<button onclick="bgGreen()">Go green!</button>
<br><br>
<button onclick="document.body.style.backgroundColor = 'red';">
Or red ...
</button>
<script>
function bgGreen() {
document.body.style.backgroundColor = "green";
}
</script>
</body>
</html>
Copy and paste this code into a new file in your HTML editor, save the file as javascript-demo-32.html, and open the file in a web browser. Click on the buttons to see what happens. If you click on the "Go green!" button, you should see something like this:
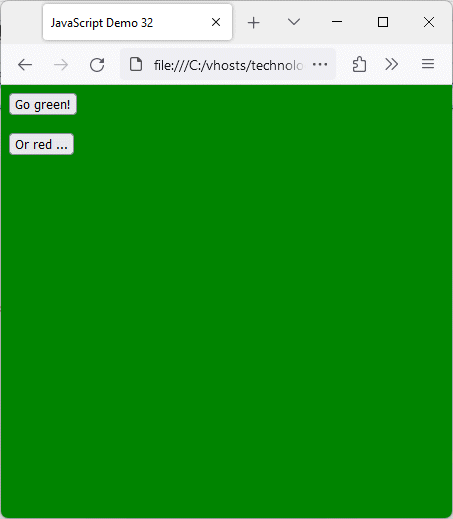
Changing the background colour of a web page using inline event handlers
The onClick event handler for the "Go green!" button is the bgGreen() function, which is defined inside a <script>…</script> tag elsewhere on the page. The code for the "Or red …" button is defined directly inside the <button>…</button> tag itself. This works, but it's considered to be very bad practice. For one thing, it clutters up your HTML code and makes it hard to read. It also means that if you want to use the same code elsewhere - on another button, for example - you have to type it in again.
Note that a <script>…</script> tag can appear anywhere inside the head or body of a web page. Generally speaking, however, it’s considered good practice to place any JavaScript code immediately before the closing </body> tag. The browser reads code sequentially when loading a page, so if you have a lot of JavaScript code in the head of the document, or at the start of the body of the document, it can make the page appear slow to load because the JavaScript code will be parsed before any HTML elements are displayed.
Using inline event handlers, whilst often convenient, is no longer encouraged and is considered bad practice. The general consensus seems to be that keeping JavaScript and HTML separate is more conducive to producing maintainable and re-usable code, especially if the JavaScript is kept in a separate file, because the same functions can then be used in multiple HTML documents to carry out common tasks (this is essentially the idea behind JavaScript libraries).
The second approach we will look at involves indirectly assigning the event handling code to an event property, which keeps the JavaScript code separate from the HTML code. To see how this works, we’ll look at an example. The following code creates a web page with two buttons, each of which has a different event handler function associated with its onClick event property:
<!doctype html>
<html lang="en">
<head>
<meta charset="utf-8" />
<title>JavaScript Demo 33</title>
</head>
<body>
<button id="button1">Do something!</button>
<br><br>
<button id="button2">Do something else!</button>
<script>
let button1 = document.querySelector("#button1");
let button2 = document.querySelector("#button2");
button1.onclick = function() {
alert("The first button is clicked!");
};
button2.onclick = function() {
alert("The second button is clicked!");
</script>
</body>
</html>
Copy and paste this code into a new file in your HTML editor, save the file as javascript-demo-33.html, and open the file in a web browser and click on one of the buttons to see what happens. Depending on which button you clicked, you should see something like this:
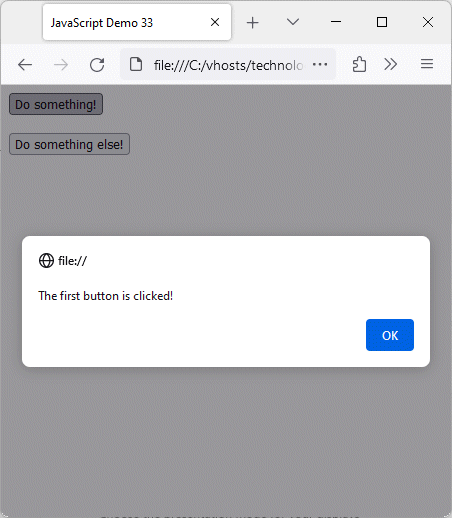
Event handling code can be assigned to an event property
Note that, because we are not using an inline event handler, we need to identify the element we wish a particular event handler to respond to. If we don’t do so, the handler will only be triggered by a click on the first element of the specified type. Consider the following code:
const button = document.querySelector("button");
button.onclick = function() {
alert("The button has been clicked!");
};
The code assigns a reference for the first element in the HTML document of type <button> to button. It then assigns an anonymous function to the onclick property of button that displays an alert message. You can have any number of buttons on a web page, but this code will only work for the button that is defined first in the HTML code.
Using an event handler property is better than using an inline event handler in the sense that it at least keeps the JavaScript code separate from the HTML code, but it still has its limitations. As with the inline event handler, you can only set one event handler for an HTML element using this method. If you try to set up multiple event handlers for the same event property, the last event handler you assign to the event property will overwrite any previous ones.
The most flexible way (and indeed the recommended way) of assigning event handlers to HTML elements is to use an event listener. We add an event handler to an element in JavaScript using the addEventListener() method. The following code creates a web page with a single button that displays the message "Hello World!" and changes the background colour of the page to green:
<!doctype html>
<html lang="en">
<head>
<meta charset="utf-8" />
<title>JavaScript Demo 34</title>
</head>
<body>
<button id="hello">Say hello . . .</button>
<br><br>
<h1 id="greet"</h1>
<script>
let btn = document.querySelector("#hello");
function sayHello() {
greet.innerHTML = "Hello World!";
};
function bgGreen() {
document.body.style.backgroundColor = "green";
};
btn.addEventListener("click", sayHello);
btn.addEventListener("click", bgGreen);
</script>
</body>
</html>
Copy and paste this code into a new file in your HTML editor, save the file as javascript-demo-34.html, open the file in a web browser and click on the button to see what happens. You should see something like this:
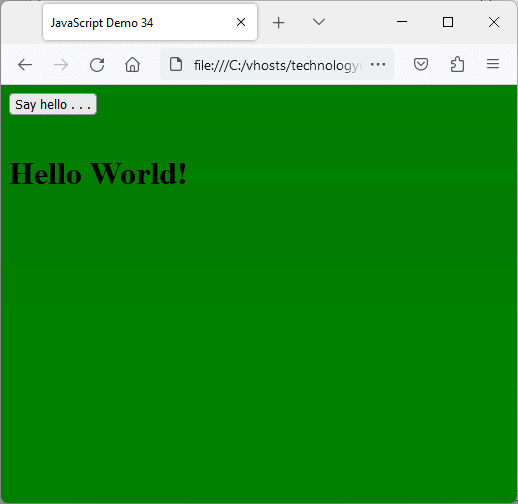
Multiple event listeners can respond to the same event
We have defined two functions, sayHello() and bgGreen(), that do the actual work. We have also defined two event listeners that respond to the button’s click event. The general syntax used with the addEventListener() method is as follows:
EventTarget.addEventListener(eventtype, callback);
where EventTarget usually refers to a specific HTML element in the document, eventtype is the type of event the listener will respond to when triggered on that element, and callback is the event handler that will be executed in response to the event (this can be either a function or an object that has a handleEvent() method).
Both of the event listeners we have defined in the above example respond to a click event on the same button, but each one calls a different event handler. Note that if multiple event listeners are added to the same element for the same event, the corresponding event handlers will be executed in the order in which the event listeners appear.
We may occasionally need to remove an event listener. We might, for example, only want an event handler to run once. Alternatively, we might wish to use the same element to trigger different event handlers in different scenarios. We could also remove event handlers that are no longer needed in order to optimise performance (a good rule of thumb in this respect is that if you remove an element, you should also remove any event listeners for which that element is the target).
We remove an event listener using the removeEventListener() method. This method takes two arguments, which must be identical to the eventType and callback arguments we passed to the addEventListener() method when we created the event listener we now wish to remove. The following code creates a web page with a single <h1> element and two buttons:
<!doctype html>
<html lang="en">
<head>
<meta charset="utf-8" />
<title>JavaScript Demo 35</title>
</head>
<body>
<button id="hello">Say hello . . .</button>
<br><br>
<button id="goodbye">Say goodbye . . .</button>
<br><br>
v<h1 id="msg"></h1>
<script>
let btn1 = document.querySelector("#hello");
let btn2 = document.querySelector("#goodbye");
btn1.addEventListener("click", sayHello);
btn2.addEventListener("click", sayGoodbye);
function sayHello() {
msg.innerHTML = "Hello World!";
btn1.removeEventListener("click", sayHello);
};
function sayGoodbye() {
msg.innerHTML = "That's all folks!";
btn2.removeEventListener("click", sayGoodbye);
};
</script>
</body>
</html>
Copy and paste this code into a new file in your HTML editor, save the file as javascript-demo-35.html, open the file in a web browser and click on each of the buttons several times in any order to see what happens. Depending on which button you clicked first, you should see something like this:
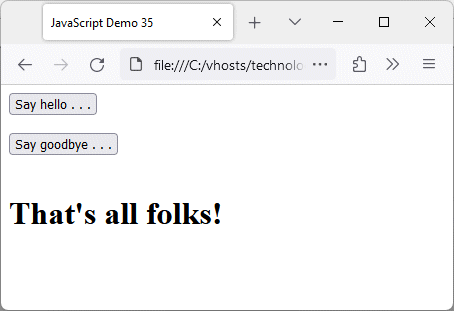
Event listeners can be removed at any time
Each button has an associated event listener that calls an event handler function when the button is clicked. In each case, the event handler function displays a message by setting the inner HTML of the <h1> element, and then removes the event listener to which it is attached, preventing the event handler for the button’s click event from being called more than once.
Note that, although the event handler passed to an event listener can be an anonymous function, we can only remove an event listener using the removeEventHandler() method if the event handler has been implemented using a function declaration, or as a function expression assigned to a variable, because we need to pass a named function or function expression to the removeEventHandler() method as its second argument. The following code does not work:
<button id="doSomething">Do something . . .</button>
.
.
.
<button id="doNothing">Stop doing something . . .</button>
<script>
let btn1 = document.querySelector("#doSomething");
let btn2 = document.querySelector("#doNothing");
doNothing = function () {
btn1.removeEventListener("click", () => {alert("Button clicked!")});
}
btn1.addEventListener("click", () => {alert("Button clicked!")});
btn2.addEventListener("click", doNothing);
</script>
Even though we have passed exactly the same arguments to both the addEventListener() and removeEventListener() methods, the event listener will not be removed because JavaScript sees two identical but unrelated anonymous functions. The following code, on the other hand, does work:
<button id="doSomething">Do something . . .</button>
.
.
.
<button id="doNothing">Stop doing something . . .</button>
<script>
let btn1 = document.querySelector("#doSomething");
let btn2 = document.querySelector("#doNothing");
doSomething = function () {
alert("Button clicked!");
}
doNothing = function () {
btn1.removeEventListener("click", doSomething);
}
btn1.addEventListener("click", doSomething);
btn2.addEventListener("click", doNothing);
</script>
In the context of JavaScript events, the term propagation refers to how events travel through the Document Object Model (DOM) tree structure. For a typical web page, the top-level object - the root of the tree - is the document object. Below that we have the HTML elements that define the document structure. If the HTML code itself is well structured, you can get a good sense of the document structure by looking at the code. The more deeply nested an HTML elements is, the greater the level of indentation. Consider the following HTML code:
<!doctype html>
<html lang="en">
<head>
<meta charset="utf-8" />
<title>My Web Page</title>
</head>
<body>
<div>
<h1>My Web Page</h1>
<div>
<div>
<button>Click me!</button>
</div>
</div>
</div>
</body>
</html>
Simply by examining the above code, we can derive a simplified DOM structure for this web page, which would look like this:
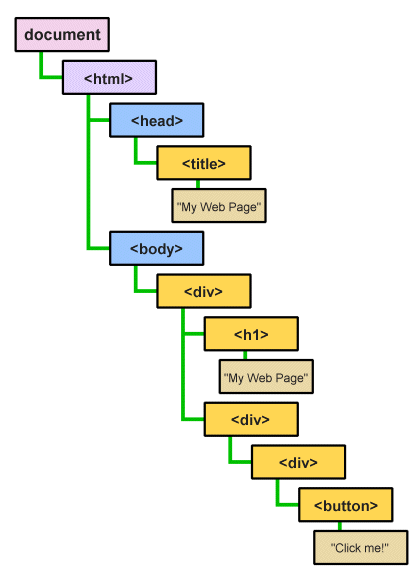
The DOM structure reflects how the HTML elements are nested
Nothing happens when we click on the button in this web page because, as yet, we have not created an event handler to handle such an event. The event will nevertheless occur, whether we explicitly handle it or not, as evidenced by the fact that the button’s appearance will change when we hover over it with the mouse (the mouseover event), and it will change again in response to the mousedown and mouseup events (all of these events, as well as the click event, will occur when you click on a button).
When you click on the button object, however, you are also clicking on every object in the DOM that lies directly between the button and the root of the DOM (the document object), as well as on the document object itself, because the event propagates through the tree structure. We can think of event propagation like this: when you click on an HTML element such as a button, a signal is generated that propagates down through the DOM tree structure from the root to the target element, and then returns along the same path but in the opposite direction, from the target element to the root.
The phase during which the event travels from the root to the target is known as the capture phase, the arrival of the signal at the target is called the target phase, and the phase during which the event travels back up the tree structure from the target to the root is called the bubbling phase - presumably because the event "bubbles up" through the DOM tree structure. The path taken by the event down through the DOM tree structure and back is known as the event chain.
Suppose we have an event handler for the click event associated with a button that is deeply nested within the DOM structure. If we click on the button, the click event will travel down through the DOM tree until it reaches the target element (the button), at which point the target element’s event handler will be executed. But what happens if one or more of the other elements in the event chain also have event handlers for the click event associated with them?
By default, all of these event handlers will be executed, starting with the target element’s click event handler. The click event handlers on other elements in the event chain will be executed in order, during the bubbling phase, i.e., as the event propagates up the event chain from the target. The following code creates a web page that demonstrates how this works:
<!doctype html>
<html lang="en">
<head>
<meta charset="utf-8" />
<title>JavaScript Demo 36</title>
<style>
div {
border: 1px solid black;
margin: 1em;
padding: 1em;
}
</style>
</head>
<body>
<div id="div01">div01
<div id="div02">div02
<div id="div03">div03
<button id="button01">Click me!</button>
</div>
</div>
</div>
<div>
<ul id="output"></ul>
</div>
<script>
const div01 = document.querySelector("#div01");
const div02 = document.querySelector("#div02");
const div03 = document.querySelector("#div03");
const button01 = document.querySelector("#button01");
const output = document.querySelector("#output");
document.addEventListener("click", clearOutput, {capture: true});
button01.addEventListener("click", clickButton01);
div01.addEventListener("click", clickDiv01);
div02.addEventListener("click", clickDiv02);
div03.addEventListener("click", clickDiv03);
function clearOutput() {
output.innerHTML = "";
}
function clickButton01() {
output.innerHTML += "<li>button01 was clicked.</li>";
}
function clickDiv01() {
output.innerHTML += "<li>div01 was clicked.</li>";
}
function clickDiv02() {
output.innerHTML += "<li>div02 was clicked.</li>";
}
function clickDiv03() {
output.innerHTML += "<li>div03 was clicked.</li>";
}
</script>
</body>
</html>
Copy and paste this code into a new file in your HTML editor, save the file as javascript-demo-36.html, open the file in a web browser and click on the "Click me!" button to see what happens. You should see something like this:
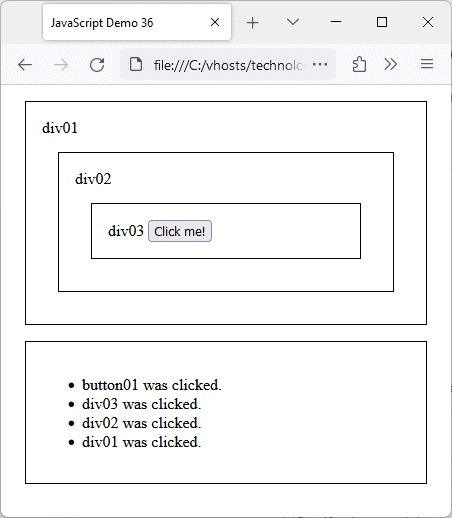
Event handlers are triggered during the bubbling phase by default
You can clearly see from the order in which the statements appear in the bulleted list that the event handlers have been triggered during the bubbling phase, starting with the event handler for button01 (the event target) and proceeding up the event chain, back towards the root of the DOM tree structure. Try clicking on div01, div02 and div03 individually to see what happens. This should give you a feel for how events propagate through the DOM tree structure by default.
It is also possible for events to be triggered in the capture phase, i.e., as the event travels downwards through the event chain from the root. If we want this to happen, we can set the capture property of an event listener’s options argument to true. In the above example, we have added an event listener to the document itself that will be triggered during the capture phase in order to clear the output box before any other event listeners are triggered (we’ll be looking in more detail at the options argument in due course).
Of course, it will often be the case that we don’t want event handlers to be triggered on elements other than the event target itself. In order to prevent that from happening, we need to keep the event from bubbling up through the DOM tree structure. We will see how this can be achieved when we look at the event object in more detail.
We will come back to the subject of event propagation - and how we can control the flow of events through the event chain - in due course. At this point, it is worth emphasising that the default behaviour is for event listeners to be triggered only during the targeting and bubbling phases, starting with any event listeners associated with the event target, and continuing with the event listeners (if any) associated with elements at successively higher levels
It is also worth noting that, while all event types go through the capturing and targeting phases, not all event types bubble. Notable examples of events that do not bubble are the scroll, focus and blur events, understandably so as these events relate solely to specific elements and actions (only one element can have or lose the focus at any given time, for example).
The addEventListener() method has an optional third argument which can be either the useCapture argument or an options object. The useCapture argument is a boolean value indicating whether or not to use capture, and is a throwback to older versions of the DOM specification (the term capture refers to the phase in which the event listener will be handled - something we will be looking at in due course).
More recent versions of the DOM specification have recognised the need for additional options, and rather than add additional parameters to the addEventListener() method, it was decided that the third argument would become an object, with properties whose values would specify those additional options.
Older browsers still expect a boolean value as the third argument supplied to addEventListener(). In fact, some older browsers actually require the useCapture argument to be supplied, and do not support additional options. It is possible to write JavaScript code that will check whether or not the browser recognises the additional parameters and take appropriate action. For the purposes of this discussion, we will only consider the use of the options object.
The options object has four properties, all of which are optional:
It is often the case that we want to take some action the first time an event occurs but not thereafter. We have already described one way of doing this, which is to remove the event listener corresponding to that event as soon as its event handler has run. Another way is to use the once option. The following code demonstrates how this works:
<!doctype html>
<html lang="en">
<head>
<meta charset="utf-8" />
<title>JavaScript Demo 37</title>
</head>
<body>
<button id="hello">Say hello . . .</button>
<button id="goodbye">Say goodbye . . .</button>
<h1 id="msg"></h1>
<script>
let btn1 = document.querySelector("#hello");
let btn2 = document.querySelector("#goodbye");
btn1.addEventListener("click", () => {
msg.innerHTML = "Hello World!"}, {once: true});
btn2.addEventListener("click", () => {
msg.innerHTML = "That's all folks!"}, {once: true});
</script>
</body>
</html>
Copy and paste this code into a new file in your HTML editor, save the file as javascript-demo-37.html, open the file in a web browser and click on each of the buttons several times in any order to see what happens. Depending on which button you clicked first, you should see something like this:
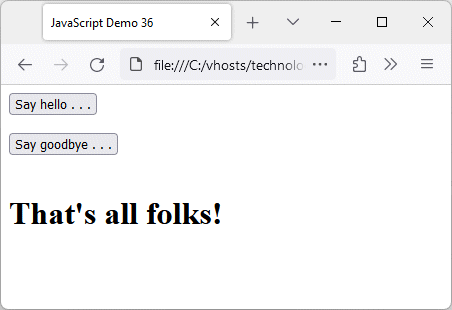
If the once option is used, the event handler will only run once
The result is exactly the same as for the previous example, but the JavaScript code is more compact. Once the event handler has been executed, the event listener is removed automatically. When you only want to run an event handler once, using the once option with an anonymous event handler function provides a more compact and efficient solution than using the removeEventHandler() method.
As we have previously stated, by default event listeners are triggered only in the targeting and bubbling phases of event propagation. There may be occasions, however, when we want to trigger an event listener further up the DOM tree structure before the event handler on the event target itself is triggered. If we want to trigger a particular event listener during the capture phase, we can do this by setting the capture option of the options argument for the event listener to true.
You may remember that we used this feature in our event propagation demo web page (javascript-demo-36.html) using the following code:
document.addEventListener("click", clearOutput, {capture: true});
.
.
.
function clearOutput() {
output.innerHTML = "";
}
We used this code to ensure that, whatever element within the document was clicked, the output box used to display the result of clicking that element would be cleared of any pre-existing information before the new results were displayed. The document object's event listener is triggered as soon as we click anywhere in the document.
By setting the capture option to true, we have instructed the browser to trigger the document object's click event handler in the capture phase. Had we not done so, the output box would be cleared only after the click event had bubbled back up the DOM tree to the document object, and we would never see any output.
The following code creates a web page that appears to be identical to the demo page we used earlier to demonstrate event propagation. This time, however, we are going to specify that all of the event listeners are triggered in the capture phase. Here is the code:
<!doctype html>
<html lang="en">
<head>
<meta charset="utf-8" />
<title>JavaScript Demo 38</title>
<style>
div {
border: 1px solid black;
margin: 1em;
padding: 1em;
}
</style>
</head>
<body>
<div id="div01">div01
<div id="div02">div02
<div id="div03">div03
<button id="button01">Click me!</button>
</div>
</div>
</div>
<div>
<ul id="output"></ul>
</div>
<script>
const div01 = document.querySelector("#div01");
const div02 = document.querySelector("#div02");
const div03 = document.querySelector("#div03");
const button01 = document.querySelector("#button01");
const output = document.querySelector("#output");
document.addEventListener("click", clearOutput, {capture: true});
button01.addEventListener("click", clickButton01, {capture: true});
div01.addEventListener("click", clickDiv01, {capture: true});
div02.addEventListener("click", clickDiv02, {capture: true});
div03.addEventListener("click", clickDiv03, {capture: true});
function clearOutput() {
output.innerHTML = "";
}
function clickButton01() {
output.innerHTML += "<li>button01 was clicked.</li>";
}
function clickDiv01() {
output.innerHTML += "<li>div01 was clicked.</li>";
}
function clickDiv02() {
output.innerHTML += "<li>div02 was clicked.</li>";
}
function clickDiv03() {
output.innerHTML += "<li>div03 was clicked.</li>";
}
</script>
</body>
</html>
Copy and paste this code into a new file in your HTML editor, save the file as javascript-demo-38.html, open the file in a web browser and click on the "Click me!" button to see what happens. You should see something like this:
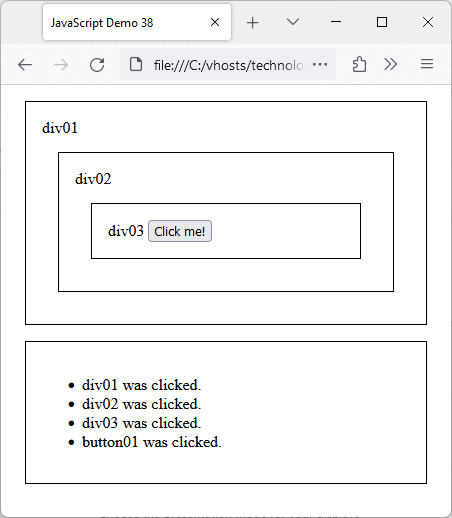
Event handlers can be triggered during the capture phase
You can see from the order in which the statements appear in the bulleted list that the event handlers have been triggered during the capture phase, starting with the event handler for div01 and proceeding up the event chain, back towards the root of the DOM tree structure. This means that when we click on button01, its event listener will be the last one triggered - the order in which events are triggered is the exact opposite of what we experienced previously.
As you may already have realised, event listeners are triggered only once, regardless of where they are triggered in the event chain. An event listener that is triggered in the capture phase will not be triggered a second time as the event bubbles back up the event chain. Generally speaking, triggering event listeners during the capture phase is the exception rather than the rule, but there are some situations, as we have seen where it can be used to good effect.
We saw earlier that an event listener can be removed after its event handler has been run once by setting the once option of the event handler's options argument to true. We can also remove an event listener using the signal option of the options argument. This is useful in situations where we don't want to limit the event handler to running one time only, but wish to remove the event listener once a specific condition has been met, such as a user having exceeded the permitted number of login attempts.
The first thing we need to do in order to use an abort signal is create a new AbortController object. We then create an event listener for which the signal option of the options argument is set to the AbortController object's signal property. The event listener will subsequently be removed if the AbortController object's abort() method is called. A simple example should serve to demonstrate how this works. The following code creates a web page with a button that increments a counter variable by one each time it is clicked:
<!doctype html>
<html lang="en">
<head>
<meta charset="utf-8" />
<title>JavaScript Demo 39</title>
</head>
<body>
<div>
<button id="increment">Increment counter</button>
</div>
<div>
<h4>Count:</h4>
<p id="count">Counter stands at: 0</p>
<p id="message"></p>
</div>
<script>
let counter = 0;
const incBtn = document.querySelector("#increment");
const output = document.querySelector("#count");
const msg = document.querySelector("#message");
const abortCtrlr = new AbortController;
incBtn.addEventListener("click", incrementCount, {signal: abortCtrlr.signal});
function incrementCount() {
counter++;
output.innerHTML = "Counter stands at: " + counter;
if(counter > 9) {
msg.innerHTML = "Maximum value has been reached.";
abortCtrlr.abort();
}
}
</script>
</body>
</html>
Copy and paste this code into a new file in your HTML editor, save the file as javascript-demo-39.html, open the file in a web browser and click on the "Increment counter" button repeatedly to see what happens. After ten clicks, you should see something like this:
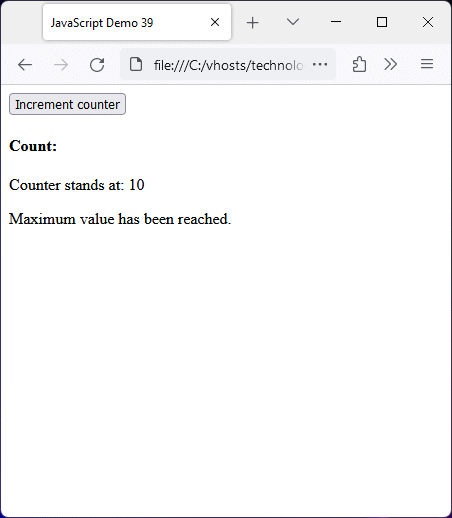
An abort signal is generated after ten clicks
Once the value of counter reaches 10, the incrementCount() function calls the abort controller's abort() method, and the event listener for the "Increment counter" button's click event is removed. Once this happens, clicking on the button will have no effect because the button no longer has an event handler associated with it for the click event.
An event handler function takes one argument, which is the event object itself, despite the fact that the parentheses following the function name are often empty - the event object is passed to the function implicitly. If we require additional information in order to determine the best way to handle the event, we can access the information stored in the event object, as demonstrated by the following code:
<!doctype html>
<html lang="en">
<head>
<meta charset="utf-8" />
<title>JavaScript Demo 40</title>
<style>
div { padding: 1em; }
table {
border-style: solid;
border-width: 1px;
border-color: #a0a0a0;
border-collapse: collapse;
margin: auto;
border-spacing: 0;
}
td, th, caption {
border: solid 1px black;
padding: 0.25em;
text-align: left;
}
</style>
</head>
<body>
<div>
<button id="myBtn">Click me!</button>
</div>
<table id="output"></table>
<script>
const btn = document.querySelector("#myBtn");
const out = document.querySelector("#output");
btn.addEventListener("click", getEntries);
function getEntries() {
output.innerHTML = "<caption>Click Event Properties</caption>";
output.innerHTML += "<tr><th>Property</th><th>Value</th></tr>";
for (key in event) {
if (typeof event[key] != 'function') {
output.innerHTML += "<tr><td>" + key + "</td><td>" + event[key] + "</td></tr>";
}
}
}
</script>
</body>
</html>
Copy and paste this code into a new file in your HTML editor, save the file as javascript-demo-40.html, open the file in a web browser and click on the "Click me!" button. You should see something like the following:
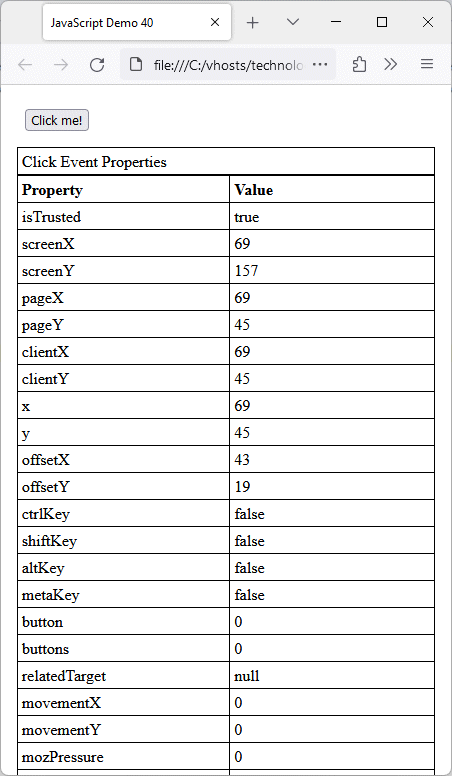
The event object has many properties
An element receives a click event when a pointing device button - usually the left mouse button - is first pressed (a mousedown event) and then released (a mouseup event) while the pointer is over the element. Out of the sixty or so properties displayed in the table as key-value pairs, only the isTrusted property belongs to the click event itself. All of the other properties are inherited.
Many of the properties you see listed above, such as the clientX and clientY properties, which give the local coordinates of the mouse pointer (its position relative to the application viewport) when the click event is triggered, are inherited from the MouseEvent interface. Other properties, such as eventPhase and target, are inherited from the Event interface, whose properties are inherited by all other event interfaces.
Properties may sometimes have different names, depending on which browser is in use. The pressure property, which indicates the normalized pressure of the pointer input, is inherited from the PointerEvent interface. It will be listed as pressure if you are using Google Chrome, and as mozPressure if you are using Mozilla Firefox.
One of the properties common to just about any type of event is the target property, which refers to the element on which the event actually occurs. We can use this, and the fact that the event bubbles up through the DOM tree structure from the target, to our advantage, because it allows us to implement something called event delegation.
The important thing to be aware of here is that the target of a click event is (usually) the most deeply nested HTML element directly under the mouse pointer when the click event occurs. The event listener, however, may be associated with an element that is higher up in the event chain, as we are about to demonstrate. The following code creates a web page that simulates a control panel with a number of control buttons:
<!doctype html>
<html lang="en">
<head>
<meta charset="utf-8" />
<title>JavaScript Demo 41</title>
<style>
div {
margin: auto;
padding: 1em;
width: max-content;
border: 1px black solid;
text-align: center;
}
button { margin: 1em; }
</style>
</head>
<body>
<div id="ctrlPnl">
<h1>Control Panel</h1>
<button id="ctrl_01">Control 01</button>
<button id="ctrl_02">Control 02</button>
<button id="ctrl_03">Control 03</button>
<button id="ctrl_04">Control 04</button>
<br>
<button id="ctrl_05">Control 05</button>
<button id="ctrl_06">Control 06</button>
<button id="ctrl_07">Control 07</button>
<button id="ctrl_08">Control 08</button>
<p id="output">Select a control.</p>
</div>
<script>
const pnl = document.querySelector("#ctrlPnl");
const out = document.querySelector("#output");
ctrlPnl.addEventListener("click", getCtrl);
function getCtrl() {
switch(event.target.id) {
case "ctrl_01":
output.innerHTML = "You selected control 01.";
break;
case "ctrl_02":
output.innerHTML = "You selected control 02.";
break;
case "ctrl_03":
output.innerHTML = "You selected control 03.";
break;
case "ctrl_04":
output.innerHTML = "You selected control 04.";
break;
case "ctrl_05":
output.innerHTML = "You selected control 05.";
break;
case "ctrl_06":
output.innerHTML = "You selected control 06.";
break;
case "ctrl_07":
output.innerHTML = "You selected control 07.";
break;
case "ctrl_08":
output.innerHTML = "You selected control 08.";
break;
default:
break;
}
}
</script>
</body>
</html>
Copy and paste this code into a new file in your HTML editor, save the file as javascript-demo-41.html, open the file in a web browser and click on the various control buttons. Depending on which button you clicked on last, you should see something like the following:
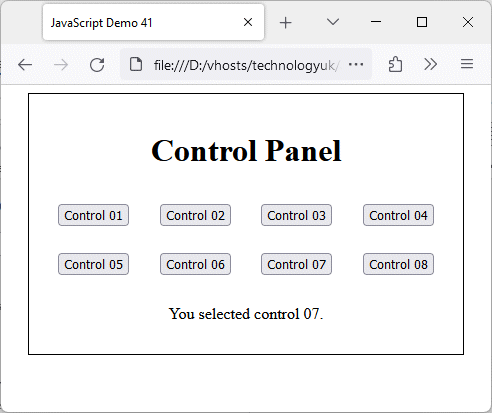
Handling the click event has been delegated to the parent <div> element
We could of course have given each control button its own event listener and associated event handler, but delegating the event handling process to the parent <div> element provides a more compact and more efficient solution. We only need to create an event listener for the <div> element, whose associated event handler will take action based on the value stored in the click event’s target property.
As well as properties, the event also has methods which we can call upon when required, as demonstrated by the following code:
<!doctype html>
<html lang="en">
<head>
<meta charset="utf-8" />
<title>JavaScript Demo 42</title>
<style>
div { padding: 1em; }
table {
border-style: solid;
border-width: 1px;
border-color: #a0a0a0;
border-collapse: collapse;
margin: auto;
border-spacing: 0;
}
td, caption {
border: solid 1px black;
padding: 0.25em;
}
</style>
</head>
<body>
<div>
<button id="myBtn">Click me!</button>
</div>
<table id="output"></table>
<script>
const btn = document.querySelector("#myBtn");
const out = document.querySelector("#output");
btn.addEventListener("click", getEntries);
function getEntries() {
output.innerHTML = "<caption>Click Event Methods</caption>";
for (key in event) {
if (typeof event[key] == 'function') {
output.innerHTML += "<tr><td>" + key + "</td><td>" + event[key] + "</td></tr>";
}
}
}
</script>
</body>
</html>
Copy and paste this code into a new file in your HTML editor, save the file as javascript-demo-42.html, open the file in a web browser and click on the "Click me!" button. You should see something like the following:
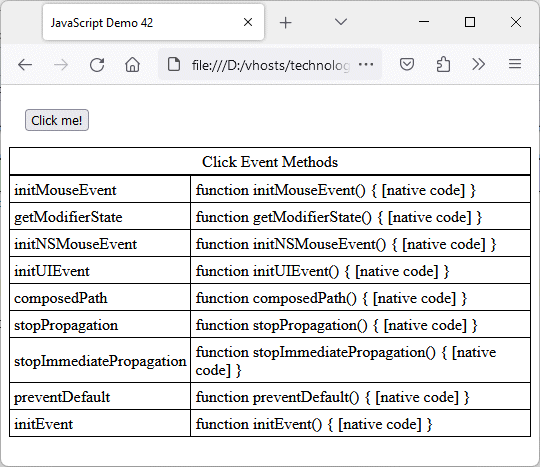
The event object also has methods
The methods we are interested in here are stopPropagation() and stopImmediatePropagation(). We have of course seen how event propagation, in particular the propagation that occurs in the bubbling phase, can be a very useful feature. We saw above, for example, how it allows us to use event delegation to write more compact and efficient event listeners.
Sometimes, though, we don’t want an event to bubble. We might want an event handler to fire on the target element itself, but not on any elements higher up the event chain that also have a handler for that particular event. That being the case, we need a way of preventing the event from propagating back up the event chain from the target.
We saw in an earlier example how a click event targeted on a deeply nested button element will also trigger event listeners associated with <div> elements above it in the event chain as the event bubbles up through the DOM structure. Just to remind you, here are the relevant code fragments:
HTML:
<div id="div01">div01
<div id="div02">div02
<div id="div03">div03
<button id="button01">Click me!</button>
</div>
</div>
</div>
JavaScript:
const div01 = document.querySelector("#div01");
const div02 = document.querySelector("#div02");
const div03 = document.querySelector("#div03");
const button01 = document.querySelector("#button01");
.
.
.
button01.addEventListener("click", clickButton01);
div01.addEventListener("click", clickDiv01);
div02.addEventListener("click", clickDiv02);
div03.addEventListener("click", clickDiv03);
From examining the above code, you should be able to see that a click event targeted on the "Click me!" button will not only trigger the button’s event listener, but will bubble up through the DOM structure, triggering the event listeners on the three <div> elements within which it is nested. We can prevent this behaviour by calling the event object’s stopPropagation() method, as demonstrated by the following code:
<!doctype html>
<html lang="en">
<head>
<meta charset="utf-8" />
<title>JavaScript Demo 43</title>
<style>
div {
border: 1px solid black;
margin: 1em;
padding: 1em;
}
</style>
</head>
<body>
<div id="div01">div01
<div id="div02">div02
<div id="div03">div03
<button id="button01">Click me!</button>
</div>
</div>
</div>
<div>
<ul id="output"></ul>
</div>
<script>
const div01 = document.querySelector("#div01");
const div02 = document.querySelector("#div02");
const div03 = document.querySelector("#div03");
const button01 = document.querySelector("#button01");
const output = document.querySelector("#output");
document.addEventListener("click", clearOutput, {capture: true});
button01.addEventListener("click", clickButton01);
div01.addEventListener("click", clickDiv01);
div02.addEventListener("click", clickDiv02);
div03.addEventListener("click", clickDiv03);
function clearOutput() {
output.innerHTML = "";
}
function clickButton01() {
event.stopPropagation();
output.innerHTML += "<li>button01 was clicked.</li>";
}
function clickDiv01() {
event.stopPropagation();
output.innerHTML += "<li>div01 was clicked.</li>";
}
function clickDiv02() {
event.stopPropagation();
output.innerHTML += "<li>div02 was clicked.</li>";
}
function clickDiv03() {
event.stopPropagation();
output.innerHTML += "<li>div03 was clicked.</li>";
}
</script>
</body>
</html>
Copy and paste this code into a new file in your HTML editor, save the file as javascript-demo-43.html, open the file in a web browser and click on different areas within the web page. You will see different messages in the output box, depending on whether you click on the button itself (see below) or one of the surrounding <div> elements.
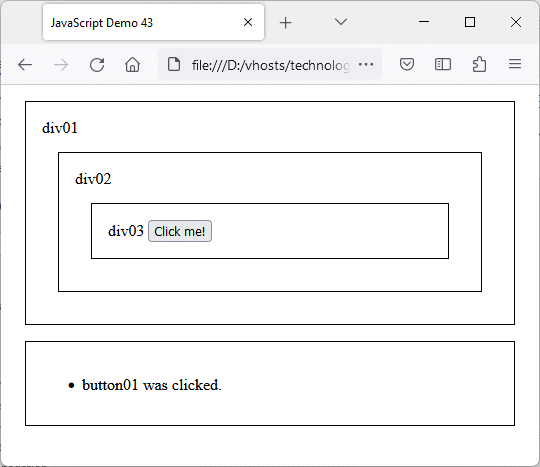
The click event does not bubble up through the event chain
As you can see from the above screenshot, when the "Click me!" button is clicked, its event handler is triggered but the event does not bubble up the event chain. The event listeners associated with the three <div> elements above the "Click me!" button in the event chain do not receive the event, so their event handlers are never called.
The stopPropagation() and stopImmediatePropagation() methods will also prevent an event from propagating down the event chain if an element has an associated event listener for which the capture property of the options argument is set to true. To see how this works, replace this line of code in the above example:
div01.addEventListener("click", clickDiv01);
with this:
div01.addEventListener("click", clickDiv01, {capture: true});
Open the file once more (or click on the refresh button if you still have the page open in a browser) and click on different areas within the web page. This time, if you click on the "Click me!" button, or on either of the nested <div> elements, the only event handler activated will be the event handler belonging to the outermost <div> element.
Note that we could have used the stopImmediatePropagation() method in our code instead of the stopPropagation() method, and the result would have been exactly the same. So what is the difference? We have already established that one of the benefits of using event listeners, as opposed to inline event handlers or event properties, is that we can create multiple event listeners for the same event. For example:
HTML:
<button id="myButton">Click me!</button>
JavaScript:
const btn = document.querySelector("#myButton");
.
.
.
btn.addEventListener("click", handler01);
btn.addEventListener("click", handler02);
btn.addEventListener("click", handler03);
If the user subsequently clicks on the "Click me!" button, all three event handlers will fire, in the order in which they have been defined. Let’s suppose that, for some reason, we only want the first event listener to respond to the click event. We know that the stopPropagation() method will prevent an event from propagating to the next element in the event chain, but that won’t help us here because all three event listeners are associated with the same element (the "Click me!" button).
This is where the stopImmediatePropagation() method comes to the rescue, because as well as preventing an event from propagating to the next element in the even chain, it also stops it from propagating to the next event listener, even if that event listener is associated with the same element in the event chain. To achieve this, our first event listener’s event handler code might look something like this:
function handler01() {
event.stopImmediatePropagation();
/* some code goes here */
}
We would comment at this point that using the stopPropagation() method in capture mode is something that you will rarely find necessary. There are probably even fewer use cases for the stopImmediatePropagation() method, either in capture mode or during the bubbling phase, although a situation could arise (for example) in which a sequence of event handlers that has been set up for the same event on an element must be interrupted, depending on the value of some external variable.
A focus event occurs when an element gains the focus. This is usually achieved when an HTML element is selected by the user, either by clicking on the element with a mouse or by navigating to it using the TAB key on the keyboard. A blur event occurs when the user navigates away from an element that currently has the focus, either by clicking on a different element, or by navigating to a different element using the TAB key.
Note that the focus and blur events do not bubble up through the DOM structure, but they can be tracked during the capture phase.
Although it is possible to assign the focus to almost any HTML element, under normal circumstances only a relatively small number of HTML elements can receive the focus. According to the DOM Level 2 HTML standard, the only elements that have a focus() method* are HTMLInputElement, HTMLSelectElement, HTMLTextAreaElement and HTMLAnchorElement. The standard makes no mention of HTMLButtonElement or HTMLAreaElement, although these elements are usually treated as being able to receive the focus.
* The HTMLElement: focus() method sets the focus on a focusable element, i.e. an element that can receive keyboard events and other forms of user input, such as a mouse click, by default.
By default, when an element receives the focus the browser scrolls that element into view, and may provide visual cues to indicate to the user that the element now has the focus, typically by displaying a highlighted border around the element or altering its appearance in some other way.
Generally speaking, the HTML elements that are focusable are those elements in a web page that allow the user to interact with the page. One place where you can pretty much guarantee to find any number of focusable elements is in an HTML form, since the sole purpose of a form is to accept user input. The following code generates a web page with an HTML form that allows the user to input their contact details:
<!doctype html>
<html lang="en">
<head>
<meta charset="utf-8" />
<title>JavaScript Demo 44</title>
<style>
div {
margin: auto;
padding: 1em;
width: max-content;
text-align: center;
}
form {
border: 1px black solid;
padding: 1em;
}
td { padding: 0.5em; }
label { text-align: right; }
button { margin-top: 1em; }
</style>
</head>
<body>
<div>
<h1>Personal Details</h1>
<p>Please enter your personal details<br>
(all fields must be completed)
</p>
<form method="post" action="">
<table>
<tr>
<td>
<label for="name">Name: </label>
</td>
<td>
<input type="text" name="name" id="name" required>
</td>
</tr>
<tr>
<td>
<label for="addr">Address: </label>
</td>
<td>
<input type="text" name="addr" id="addr" required>
</td>
</tr>
<tr>
<td>
<label for="town">Town/city: </label>
</td>
<td>
<input type="text" name="town" id="town" required>
</td>
</tr>
<tr>
<td>
<label for="pcode">Postcode: </label>
</td>
<td>
<input type="text" name="pcode" id="pcode" required>
</td>
</tr>
<tr>
<td>
<label for="tel">Tel: </label>
</td>
<td>
<input type="tel" name="tel" id="tel" required>
</td>
</tr>
<tr>
<td>
<label for="mail">Email: </label>
</td>
<td>
<input type="email" name="mail" id="mail" required>
</td>
</tr>
<tr>
<td colspan="2">
<button>Submit details</button>
</td>
</tr>
</table>
</form>
</div>
<script>
const inputs = document.querySelectorAll("input");
for(i=0; i<inputs.length; i++) {
inputs[i].addEventListener("focus", setFocus);
inputs[i].addEventListener("blur", removeFocus);
}
function setFocus() {
this.style.outline = "none";
this.style.background = "lightGrey";
}
function removeFocus() {
this.style.background = "transparent";
}
</script>
</body>
</html>
Copy and paste this code into a new file in your HTML editor, save the file as javascript-demo-44.html, open the file in a web browser and click on (or tab through) the various input boxes in the form. Depending on which input box currently has the focus, you should see something like the following:
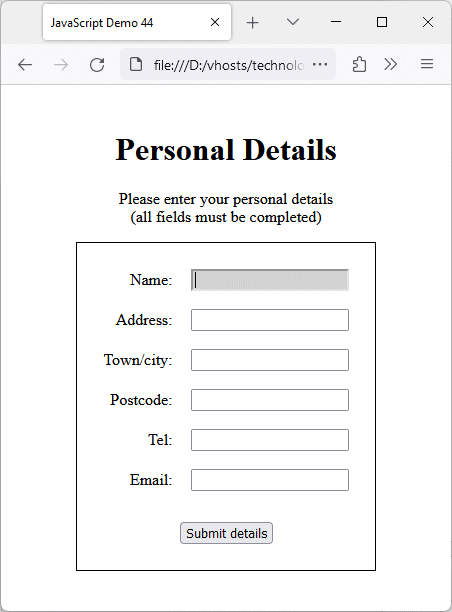
Set custom behaviour for focus and blur events
At first glance, there is nothing remarkable about the behaviour of the form. If you tab through the input boxes, you will see the background colour of each input box change from transparent to light grey and back again as it gains and loses the focus. This behaviour is not, however, the browser’s default behaviour.
Most popular browsers, including Mozilla Firefox, Google Chrome and Microsoft Edge, will highlight the border around an input box when it has the focus. We have suppressed this behaviour using the following CSS code:
input { outline: none; }
The event handler for the focus event changes the background colour of each <input> element from transparent to light grey by programmatically setting the element’s style attribute:
function setFocus() {
this.style.background = "lightGrey";
}
The event handler for the blur event changes the background colour of each <input> element back again, from light grey to transparent:
function removeFocus() {
this.style.background = "transparent";
}
Note the use of the this keyword. When used in an event handler, this references the element to which the event listener that calls the event handler belongs. This essentially means that we can use the same functions to change the background colour of any focusable element from transparent to light grey and back again. We don’t need to create a new event handler each time.
When an event such as a mouse click occurs, the browser will exhibit some default behaviour in response to that event. By default, for example, when the "Submit" button in an HTML form is clicked, the browser will submit the form and reload the page. An event’s default behaviour is usually what we want to happen and does not cause a problem. Sometimes, however, we might want to prevent an event’s default behaviour from happening.
In most cases, an event’s default behaviour will occur only after any JavaScript event handlers defined for the even have been called. This means that, if the event is cancellable, we can prevent the default behaviour from occurring by calling the event object’s preventDefault() method from an event handler.
To determine whether or not an event is cancellable, we can test the event object’s read-only cancelable property. The majority of events are cancellable, but there are some notable exceptions. The focus and blur events, for example, are not cancellable.
Preventing default behaviour should only be undertaken when absolutely necessary, because it will cause the browser’s behaviour to deviate from what the user expects. You could, for example, replace the default behaviour of a particular key combination in order to implement your own custom keyboard shortcut. However, users might find it somewhat annoying if your new shortcut replaces another commonly used keyboard shortcut.
One situation in which it might be desirable to prevent default behaviour involves the use of HTML forms. There are a number of reasons why you might not want a form to be submitted automatically when the user clicks on the form’s "Submit" button, most of which have to do with wanting to validate the form data prior to submitting the form. In most cases, we can achieve this without calling the preventDefault() method.
HTML 5 introduced a number of new input types that have basic data validation features built into them. The following HTML code snippet sets the type attribute of an <input> element to email, which means that the email address entered by the used must at least have the correct format, while the presence of the required attribute will also prevent form submission if the field is left empty:
<input type="email" required>
The validation carried out by HTML is currently still somewhat limited, so further validation can be carried out using JavaScript to ascertain whether the data input by the user meets our requirements. In the past, a JavaScript validation routine would be associated with the <form> element's onsubmit property. The code used might have taken the following general form:
<form id="myForm" onsubmit="return validateForm()" method="post">
<!-- form elements defined here -->
</form>
.
.
.
<script>
function validateForm() {
// perform validation and return
// false if invalid input found
}
</script>
If the JavaScript validation routine returns a value of false, form submission is aborted. As we have previously stated, associating event handlers with event properties in this fashion is no longer considered good practice. Instead, we should add an event listener to the <form> element's submit event.
The way most validation scripts deal with a validation failure is to abort the form submission, and display a message telling the user that an input error has occurred and requesting valid input. We could of course use a JavaScript alert to display the error message, but this is no longer considered good practice.
An alternative is to display the error message in the web page itself, which won't work if the page is automatically refreshed - the error message will appear and disappear so quickly that it cannot be read. We can stop that from happening using the preventDefault() method, which will prevent the browser from refreshing the page when the "Submit" button is clicked, or when the ENTER key is pressed while the form has the focus (both actions initiate form submission).
Let's look at an example of how this works. The code below generates a web page that is a revised version of the previous example. This page is essentially identical to its predecessor except that this time the handling of focus and blur events is left to the browser, and we will concern ourselves instead with how we can ensure that the default behaviour associated with a submit event only occurs when we are satisfied that the input is valid. Here is the code:
<!doctype html>
<html lang="en">
<head>
<meta charset="utf-8" />
<title>JavaScript Demo 45</title>
<style>
div {
margin: auto;
padding: 1em;
width: max-content;
text-align: center;
}
form {
border: 1px black solid;
padding: 1em;
}
td { padding: 0.5em; }
label { text-align: right; }
button { margin-top: 1em; }
</style>
</head>
<body>
<div>
<h1>Personal Details</h1>
<p>Please enter your personal details<br>
(all fields must be completed)
</p>
<form method="post" action="" id="frm">
<table>
<tr>
<td>
<label for="name">Name: </label>
</td>
<td>
<input type="text" name="name" id="name">
</td>
</tr>
<tr>
<td>
<label for="addr">Address: </label>
</td>
<td>
<input type="text" name="addr" id="addr">
</td>
</tr>
<tr>
<td>
<label for="town">Town/city: </label>
</td>
<td>
<input type="text" name="town" id="town">
</td>
</tr>
<tr>
<td>
<label for="pcode">Postcode: </label>
</td>
<td>
<input type="text" name="pcode" id="pcode">
</td>
</tr>
<tr>
<td>
<label for="tel">Tel: </label>
</td>
<td>
<input type="text" name="tel" id="tel">
</td>
</tr>
<tr>
<td>
<label for="mail">Email: </label>
</td>
<td>
<input type="text" name="mail" id="mail">
</td>
</tr>
<tr>
<td colspan="2">
<button>Submit details</button>
</td>
</tr>
</table>
</form>
<p id="msg"><p/>
</div>
<script>
const inputs = document.querySelectorAll("input");
const frm = document.querySelector("#frm");
const msg = document.querySelector("#msg");
frm.addEventListener("submit", validateForm);
function validateForm() {
msg.innerHTML = "";
for(i=0; i<inputs.length; i++) {
if(inputs[i].value == "") {
event.preventDefault();
switch (inputs[i].id) {
case "name":
msg.innerHTML = "Please enter your name . . .";
break;
case "addr":
msg.innerHTML = "Please enter your address . . .";
break;
case "town":
msg.innerHTML = "Please enter a town or city . . .";
break;
case "pcode":
msg.innerHTML = "Please enter a zip or postcode . . .";
break;
case "tel":
msg.innerHTML = "Please enter a telephone number . . .";
break;
case "mail":
msg.innerHTML = "Please enter an email address . . .";
break;
default:
break;
}
inputs[i].focus();
return;
}
}
}
</script>
</body>
</html>
Copy and paste this code into a new file in your HTML editor, save the file as javascript-demo-45.html, open the file in a web browser and input some data to the form, leaving one or more fields empty. Click on the submit button or press enter to trigger a submit event. Depending on the details you entered, and which input fields do not contain any data, you should see something like the following:
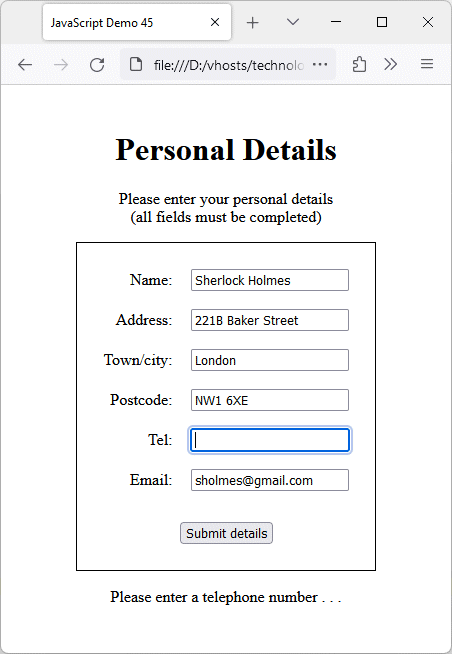
The form cannot be submitted until all input fields contain data
We have added an event listener to the form's submit event which calls the validateForm() function when the user clicks on the "Submit details" button or presses the ENTER key. The validateForm() function carries out only basic validation. It cycles through the input fields, and if they all contains data the form is submitted. If an empty input field is encountered, validateForm() calls event.preventDefault() to cancel form submission, and displays a message asking the user to enter the missing data.
Other than text, we have not used any of the built-in HTML input types that cause the browser to carry out rudimentary validation, such as email or tel. Our JavaScript validation routine simply checks whether or not there are any empty input fields. A more sophisticated routine might (for example) validate the telephone number and email address entered by checking that they are in the correct format.
Mouse events occur when the user clicks a mouse button or moves the mouse over an element in a web page. We have already seen several examples of the click event, which occurs when the left mouse button is first pressed (a mousedown event) and then released (a mouseup event) while the pointer is over an element. The table below describes the range of mouse events that can occur.
| Event | Description |
|---|---|
| click |
A user left-clicks an element |
| contextmenu |
A user right-clicks on an element |
| dblclick |
A user clicks an element twice in rapid succession |
| mousedown |
A mouse button is pressed over an element |
| mouseenter |
The mouse pointer moves into an element (similar to the mouseover event, except that the mouseenter event does not bubble) |
| mouseleave |
The mouse pointer moves out of an element (similar to the mouseout event, except that the mouseleave event does not bubble) |
| mousemove |
The mouse pointer moves over an element |
| mouseout |
The mouse pointer moves out of an element |
| mouseover |
The mouse pointer moves into an element |
| mouseup |
A mouse button is released over an element |
Because a click event is a composite event, involving a mousedown event followed by a mouseup event, it sometimes happens that the element under the cursor when the mouseup event occurs is not the same element that was under the cursor when the mousedown event occurred. This can occur, for example, when the user presses the left mouse button and then moves the mouse some distance before releasing it.
If this happens, the click event will be triggered on the most deeply nested element on which both the mousedown event and the mouseup event occurs. For example, suppose we have two buttons, both inside the same <div> element, and that we have event listeners attached to each of the buttons and the <div> element. Let's further assume that all of these event listeners are listening for a click event.
If we hold down the left mouse button whilst the mouse pointer is over the first button, and then move the mouse pointer over the second button before releasing it, which event handler will be triggered? The answer is that, since the only element in which both a mousedown event and a mouseup event occurred is the <div> element, it is the <div> element's click event handler that will be called.
Various mouse events are demonstrated by the code below, which creates a web page in which several boxes are displayed. Each box will respond to one or more mouse events, and an appropriate message will be displayed. Here is the code:
<!doctype html>
<html lang="en">
<head>
<meta charset="utf-8" />
<title>JavaScript Demo 46</title>
<style>
h1 { text-align: center; }
div {
display: flex;
padding: 0.5em;
border: 1px solid black;
justify-content: center;
align-items:center;
text-align: center;
}
.box {
width: 100px;
height: 100px;
margin: 10px;
}
.wrapper {
margin: auto;
flex-wrap: wrap;
max-width: max-content;
}
p {
margin: 1em;
text-align: center;
}
#red {
color: white;
background-color: red;
}
#grn {
color: white;
background-color: green;
}
#blu {
color: white;
background-color: blue;
}
#mov {
color: black;
background-color: yellow;
}
#mnu {
color: white;
background-color: orange;
}
</style>
</head>
<body>
<h1>Mouse Events</h1>
<div class="wrapper">
<div class="box" id="clk">
<h3>Click or double-click me!</h3>
</div>
<div class="box" id="red">
<h3>Move the mouse over me . . .</h3>
</div>
<div class="box" id="grn">
<h3>Enter me with the mouse . . .</h3>
</div>
<div class="box" id="blu">
<h3>Is my mouse depressed?</h3>
</div>
<div class="box" id="mov">
<h3>Let's move it!</h3>
</div>
<div class="box" id="mnu">
<h3>Right click me . . .<h3>
</div>
</div>
<p id="msg"></p>
<script>
const msg = document.querySelector("#msg");
const clk = document.querySelector("#clk");
const red = document.querySelector("#red");
const grn = document.querySelector("#grn");
const blu = document.querySelector("#blu");
const mov = document.querySelector("#mov");
const mnu = document.querySelector("#mnu");
clk.addEventListener("click", mouseEvt);
clk.addEventListener("dblclick", mouseEvt);
red.addEventListener("mouseover", mouseEvt);
red.addEventListener("mouseout", mouseEvt);
grn.addEventListener("mouseenter", mouseEvt);
grn.addEventListener("mouseleave", mouseEvt);
blu.addEventListener("mousedown", mouseEvt);
blu.addEventListener("mouseup", mouseEvt);
mov.addEventListener("mousemove", mouseEvt);
mnu.addEventListener("contextmenu", mouseEvt);
let x, y;
function mouseEvt() {
msg.innerHTML = "";
switch(event.type) {
case "click":
msg.innerHTML = "Ouch . . . you clicked me!";
break;
case "dblclick":
msg.innerHTML = "Ouch, ouch . . . you double clicked me!";
break;
case "mouseover":
msg.innerHTML = "Welcome to Red Square!";
break;
case "mouseout":
msg.innerHTML = "You have left Red Square!";
break;
case "mouseenter":
msg.innerHTML = "You are in the Green Zone!";
break;
case "mouseleave":
msg.innerHTML = "You have left the Green Zone!";
break;
case "mousedown":
msg.innerHTML = "Feeling blue at the moment, yes!";
break;
case "mouseup":
msg.innerHTML = "No longer feeling depressed!";
break;
case "mousemove":
x = event.screenX;
y = event.screenY;
msg.innerHTML += "Screen coordinates: x=" + x + ", y=" + y
break;
case "contextmenu":
msg.innerHTML = "A context menu . . . no surprises there!";
break;
default:
break;
}
}
</script>
</body>
</html>
Copy and paste this code into a new file in your HTML editor, save the file as javascript-demo-46.html, open the file in a web browser and move or click the mouse in each box to see what happens. Depending on which box you interact with, you should see something like the following:
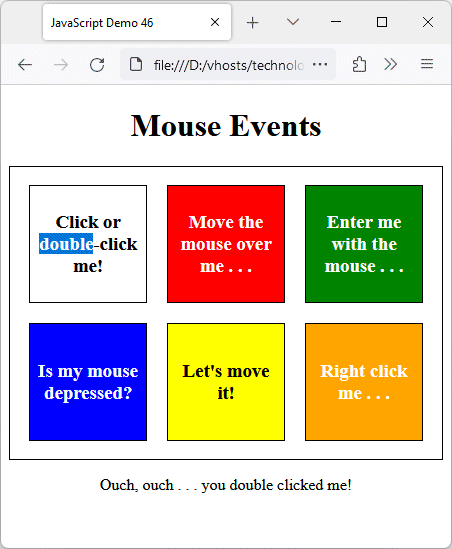
Each box has an event handler for one or more mouse events
For mobile devices such as smartphones and tablets, click events are triggered by tapping on the touchscreen with a finger or stylus. In fact, tapping the screen was essentially treated as a click event - a mousedown event followed by a mouseup event - on early mobile devices. However, using a touchscreen involves gestures for which a pointing device such as a mouse does not have any direct equivalent.
On the one hand, your finger does not have three buttons with different functionalities. On the other hand, a modern touchscreen allows you (for example) to use two or more fingers to shrink or expand an area on the screen. In many cases we don't need to worry too much about writing special JavaScript event handlers for such events because the browser's default behaviour in response to such gestures is what is required.
An in-depth exploration of touch events is somewhat outside the scope of this article. For those interested in developing touch-based user interfaces for mobile applications, or simple enhancing the functionality of a web page for mobile users, we suggest you read MDN's articles Touch Events and Using Touch Events.
Keyboard events occur when a user interacts with the keyboard. A keypress event is somewhat similar to a click event in the sense that it is a compound event - the combination of a keydown event followed by a keyup event. The range of possibilities for a keyboard event is much broader, however. For one thing, whereas a mouse (usually) only has three buttons, a keyboard typically has between 101 and 104 keys. In addition, special key combinations of two or more keys are recognised.
Most special key combinations involve pressing one of the alpha-numerical keys in combination with one or more special purpose keys such as Ctrl, Alt, Esc, the Windows key or one of the function keys (F1 to F12). We also need to take into account that an alpha-numerical key, pressed together with the Shift key, or when the Caps Lock key is on, will produce either an upper-case character or (if the key pressed is not an alpha character) a special character such as a dollar sign or a question mark.
As with mouse events, we can use event listeners to detect and handle keyboard events as they occur. As we have seen previously, If we require additional information in order to determine the best way to handle an event, we can access the information stored in the event object, as demonstrated by the following code:
<!doctype html>
<html lang="en">
<head>
<meta charset="utf-8" />
<title>JavaScript Demo 47</title>
<style>
div { padding: 1em; }
p { text-align: center; }
table {
border-style: solid;
border-width: 1px;
border-color: #a0a0a0;
border-collapse: collapse;
margin: auto;
border-spacing: 0;
}
td, th, caption {
border: solid 1px black;
padding: 0.25em;
text-align: center;
}
</style>
</head>
<body>
<p>Press a key or key combination . . .</p>
<table id="output"></table>
<script>
const out = document.querySelector("#output");
this.addEventListener("keydown", getEntries);
function getEntries() {
output.innerHTML = "<caption>Keyboard Event Properties</caption>";
output.innerHTML += "<tr><th>Property</th><th>Value</th></tr>";
for (key in event) {
if (typeof event[key] != 'function') {
output.innerHTML += "<tr><td>" + key + "</td><td>" + event[key] + "</td></tr>";
}
}
}
</script>
</body>
</html>
Copy and paste this code into a new file in your HTML editor, save the file as javascript-demo-47.html, open the file in a web browser and press any key or key combination. Depending on which key or keys you press, you should see something like the following:
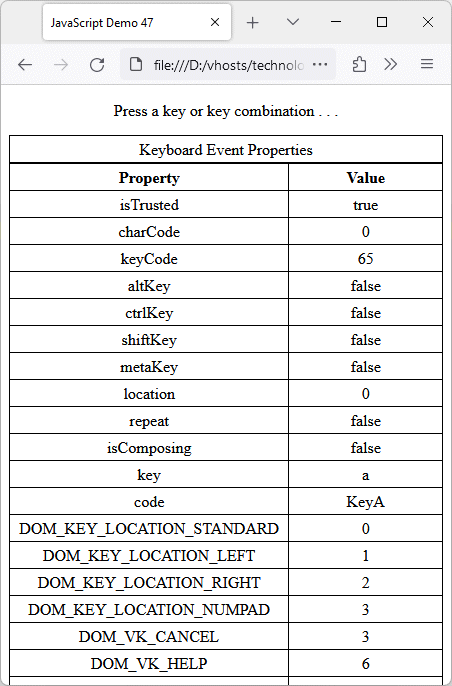
Some of the keydown event object properties
If you scroll down the table, you will see that the keydown event has some 230 or so properties, and that does not include any methods associated with the event. The bulk of these properties are read-only numerical constants that are used to identify the physical keys on the keyboard. For example, the constant DOM_VK_A has a value of 65, and identifies the "A" key.
Most of the event properties we will normally be interested in are listed at the top of the table. The table below lists some of the most important properties of the keydown event, and provides a brief description of each.
| Name | Description |
|---|---|
| charCode |
A read-only property of the KeyboardEvent interface that returns the Unicode value of the character key pressed. Ddeprecated - no longer supported by most browsers (use the key property instead). |
| keyCode |
A read-only property of the KeyboardEvent interface that represents a system- and implementation-dependent numerical code identifying the unmodified value of the key pressed. Deprecated - no longer supported by most browsers (use the code property instead). |
| altKey |
A read-only property of the KeyboardEvent interface that contains a boolean value. Returns true If the alt key is pressed when the event occurs, otherwise returns false. |
| ctrlKey |
A read-only property of the KeyboardEvent interface that contains a boolean value. Returns true If the control key is pressed when the event occurs, otherwise returns false. |
| shiftKey |
A read-only property of the KeyboardEvent interface that contains a boolean value. Returns true If the shift key is pressed when the event occurs, otherwise returns false. |
| key |
A read-only property of the KeyboardEvent interface that returns a string representing the character generated, i.e., the value of the key pressed by the user taking the state of any modifier keys such as shift, together with the keyboard locale and layout, into account. |
| code |
A read-only property of the KeyboardEvent interface that represents a physical key on the keyboard, independently of the keyboard layout or the state of any modifier keys. Useful for handling a key based on its physical position on the keyboard rather than the character associated with the key. Note that the value reported by KeyboardEvent.code cannot be used to determine the character generated by the keystroke. For example, if using an English (United Kingdom) keyboard layout with a German physical keyboard, pressing the "Z" key generates a value for code of KeyY, while pressing the "Y" key generates a value of KeyZ (to determine what character is actually generated, use key instead). |
The code below generates a web page that responds to single keypress or a combination of keys being pressed simultaneously, and displays a message informing the user which keys have been pressed. The JavaScript event handler that captures the key or key combination is fairly rudimentary in that it doesn't work for all possible key combinations (that would require a much more sophisticated routine), but it does identify a significant number of key combinations. Here is the code:
<!doctype html>
<html lang="en">
<head>
<meta charset="utf-8" />
<title>JavaScript Demo 48</title>
<style>
#main {
max-width: max-content;
margin: auto;
text-align: center;
}
#output { color: green; }
</style>
</head>
<body>
<div id="main">
<h1>Keypress Test Page</h1>
<p>Select the input box and hold down any key combination . . .</p>
<h3>Key or key combination: <br><br><span id="output"></span></h3>
</div>
<script>
const output = document.querySelector("#output");
this.addEventListener("keydown", () => event.preventDefault);
this.addEventListener("keyup", () => event.preventDefault);
this.addEventListener("keydown", reportKeys);
function reportKeys() {
output.innerHTML = "";
if (event.getModifierState("Control") && event.key != "Control") {
output.innerHTML += "Ctrl + ";
}
if (event.getModifierState("Alt") && event.key != "Alt") {
output.innerHTML += "Alt + ";
}
if (event.getModifierState("Shift") && event.key != "Shift") {
output.innerHTML += "Shift + ";
}
output.innerHTML += event.code;
if (event.getModifierState("CapsLock")) {
if(event.key != "CapsLock") {
output.innerHTML += " (caps Lock is on)";
}
}
}
</script>
</body>
</html>
Copy and paste this code into a new file in your HTML editor, save the file as javascript-demo-48.html, open the file in a web browser and press any key or key combination. Depending on which key or keys you press, you should see something like the following:
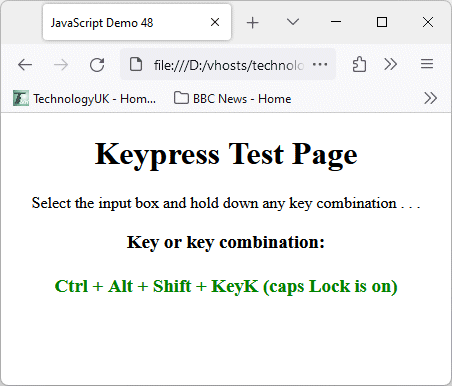
The reportKey() function identifies a number of key combinations
We have added event listeners to the document (using the this keyword), for both the keydown and keyup events, that call the event's preventDefault() method. This stops most (though not all) of the default behaviour associated with the keys on the keyboard for these events. We have added a second event listener to the keydown event that calls the reportKeys() function.
The reportKeys() function uses the keydown event's getModifierState() method to determine whether or not one or more of the most commonly used modifier keys (Shift, Control, Alt and Caps Lock) are depressed, and if so, whether they were used alone or in combination with other keys. Note that the value of the event.code property identifies the physical key on the keyboard, and may not match the character printed on the key itself due to variations in international keyboard layouts.
Window and document events are events that are triggered by some kind of interaction between the user and the web page as a whole rather than with a specific HTML element within the page. Such events include loading and unloading a document, scrolling vertically or horizontally within a document, and resizing the document window. Let's start by looking at the load event. We have already seen examples of load events that fire on the <body> element within a web page:
<body onload="someFunction()">
.
.
.
<script>
function someFunction() {
// code to handle the load event
}
</script>
You will still see this a lot if you maintain legacy code. While this approach works perfectly well, it is generally considered better practice to add an event listener to the window object, like this:
<script>
window.addEventListener("load", someFunction);
.
.
.
function someFunction() {
// code to handle the load event
}
</script>
A load event is fired only after a web page has finished loading, including all external script files, stylesheets, and media resources. The event is not cancellable, and does not bubble. Let's see what happens when a load event occurs. The following code generates a web page that lists the properties of the load event:
<!doctype html>
<html lang="en">
<head>
<meta charset="utf-8" />
<title>JavaScript Demo 49</title>
<style>
h1 { text-align: center; }
table {
border-style: solid;
border-width: 1px;
border-color: #a0a0a0;
border-collapse: collapse;
margin: auto;
border-spacing: 0;
}
td, th, caption {
border: solid 1px black;
padding: 0.25em;
}
caption {text-align: center; }
th {text-align: left; }
</style>
</head>
<body>
<h1>The Window:load Event</h1>
<table id="output"></table>
<script>
const output = document.querySelector("#output");
window.addEventListener("load", getEntries);
function getEntries(event) {
output.innerHTML = "<caption>Load Event Properties</caption>";
output.innerHTML += "<tr><th>Property</th><th>Value</th></tr>";
for (key in event) {
if (typeof event[key] != 'function') {
output.innerHTML += "<tr><td>" + key + "</td><td>" + event[key] + "</td></tr>";
}
}
}
</script>
</body>
</html>
Copy and paste this code into a new file in your HTML editor, save the file as javascript-demo-49.html, then open the file in a web browser. Depending on which browser you use, you should see something like this:
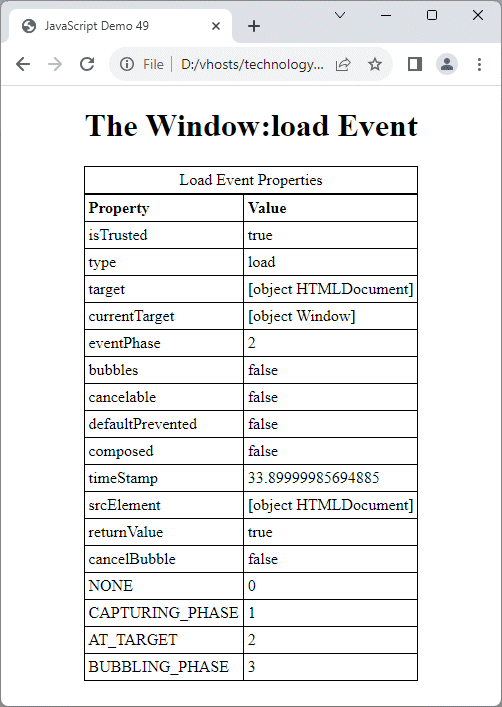
The table lists properties of the load event
Note that, regardless of the fact that we added the event listener to the window object, the target property has the value [object HTMLDocument]. This appears to be for historical reasons, and can be slightly confusing. Suffice it to say that the event is actually triggered on the window object. Note that the currentTarget property, which identifies the element to which the event handler is attached, has the value [object Window].
It will sometimes the case that you want to run a script without waiting for all of the external page resources to finish loading. This can be achieved using the DOMContentLoaded event, which fires on the document as soon as the HTML document has been downloaded and parsed, and the document object model (DOM) has been constructed. The event handler will execute without waiting for any external resources to be loaded. The following code generates a web page that lists the properties of the DOMContentLoaded event:
<!doctype html>
<html lang="en">
<head>
<meta charset="utf-8" />
<title>JavaScript Demo 50</title>
<style>
h1 { text-align: center; }
table {
border-style: solid;
border-width: 1px;
border-color: #a0a0a0;
border-collapse: collapse;
margin: auto;
border-spacing: 0;
}
td, th, caption {
border: solid 1px black;
padding: 0.25em;
}
caption {text-align: center; }
th {text-align: left; }
</style>
</head>
<body>
<h1>The Document: DOMContentLoaded Event</h1>
<table id="output"></table>
<script>
const output = document.querySelector("#output");
document.addEventListener("DOMContentLoaded", getEntries);
function getEntries(event) {
output.innerHTML = "<caption>DOMContentLoaded Event Properties</caption>";
output.innerHTML += "<tr><th>Property</th><th>Value</th></tr>";
for (key in event) {
if (typeof event[key] != 'function') {
output.innerHTML += "<tr><td>" + key + "</td><td>" + event[key] + "</td></tr>";
}
}
}
</script>
</body>
</html>
Copy and paste this code into a new file in your HTML editor, save the file as javascript-demo-50.html, then open the file in a web browser. Depending on which browser you use, you should see something like this:
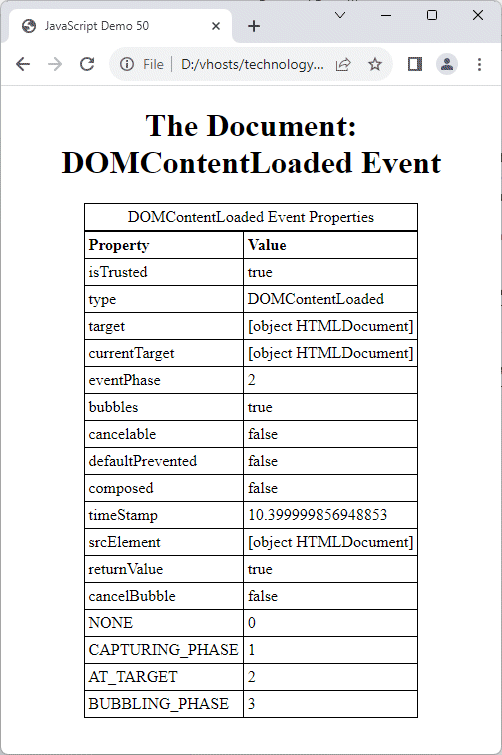
The table lists properties of the DOMContentLoaded event
Note that this time both the target and currentTarget properties are set to [object HTMLDocument]. The DOMContentLoaded event will wait for deferred scripts (a topic we will discuss elsewhere), but not for other kinds of scripts, stylesheets or image files (although note also that the deferred scripts themselves will wait for things like stylesheets).
When we resize a browser window, a resize event is triggered on the window object, and any event listener that handles a resize event must be added to the window object. In some early browsers it was possible to assign event handlers for the resize event to just about any HTML element, but today only event handlers registered on the window object will receive a resize event, which is not cancellable and does not bubble.
The code below generates a web page that tells the user the inner dimensions of the browser window. Each time the window changes size, the getWinSize() function is called, which retrieves the values of the Window:innerWidth and Window:innerHeight properties and displays them on the screen. Here is the code:
<!doctype html>
<html lang="en">
<head>
<meta charset="utf-8" />
<title>JavaScript Demo 51</title>
<style>
h1 { text-align: center; }
div {
max-width: max-content;
margin: auto;
}
</style>
</head>
<body>
<h1>The Window:resize Event</h1>
<div>
<p>Resize the browser window to fire the <code>resize</code> event.</p>
<p>Window width: <span id="width"></span></p>
<p>Window height: <span id="height"></span></p>
</div>
<script>
const winWidth = document.querySelector("#width");
const winHeight = document.querySelector("#height");
window.addEventListener("load", getWinSize);
window.addEventListener("resize", getWinSize);
function getWinSize() {
winWidth.textContent = window.innerWidth;
winHeight.textContent = window.innerHeight;
}
</script>
</body>
</html>
Copy and paste this code into a new file in your HTML editor, save the file as javascript-demo-51.html, then open the file in a web browser and try resizing the browser window to see what happens. Depending on the dimensions of the browser window at any given time, you should see something like this:
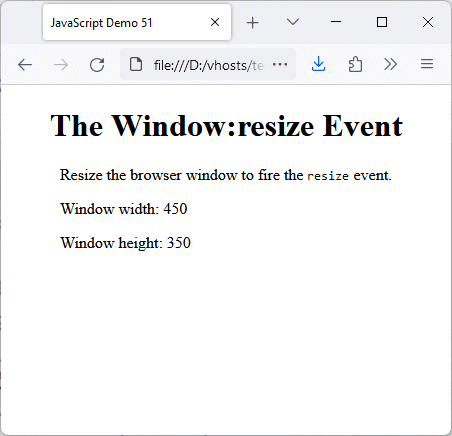
The resize event can only be fired on the window object
The getWinSize() function will be called multiple times while the document window is being resized. Note that, because we also want the window's size to be reported when the page is first opened, we have added an event listener to the window object for the load event that also calls getWinSize().
A scroll event occurs when a user scrolls vertically (or sometimes horizontally) within a web page. Scrolling becomes necessary when we want to see a part of a document that is not currently visible. The scrolling action does not change the content or layout of the page in any way. It simply brings page content into view that was previously outside the browser's viewport (the area of the screen in which content can be seen).
The scroll event can be used to update the page in some way as the user scrolls through a document. The following code generates a web page with enough text content to require the user to scroll up and down the page in order to see the text:
<!doctype html>
<html lang="en">
<head>
<meta charset="utf-8" />
<title>JavaScript Demo 52</title>
<style>
#scrollPos {
font-weight: bold;
color: red;
}
header {
position: fixed;
top: 0;
left: 0;
width: 100%;
background-color: #eee;
text-align: center;
}
#output {
max-width: max-content;
margin: 160px auto 0;
text-align: center;
}
</style>
</head>
<body>
<header>
<h1>The Document:scroll Event</h1>
<p>Scroll the browser window to fire the <code>scroll</code> event.</p>
<p>The current vertical scroll position is: <span id="scrollPos"></span></p>
</header>
<div id="output"></div>
<script>
window.addEventListener("load", getScrollPos);
for (let i=0; i< 200; i++) {
output.innerHTML += "I must stop repeating myself . . . . <br>";
}
document.addEventListener("scroll", getScrollPos);
function getScrollPos() {
scrollPos.innerHTML = window.scrollY + " pixels";
}
</script>
</body>
</html>
Copy and paste this code into a new file in your HTML editor, save the file as javascript-demo-52.html, then open the file in a web browser and try scrolling up and down within the page to see what happens. Depending on the where in the document you are, you should see something like this:
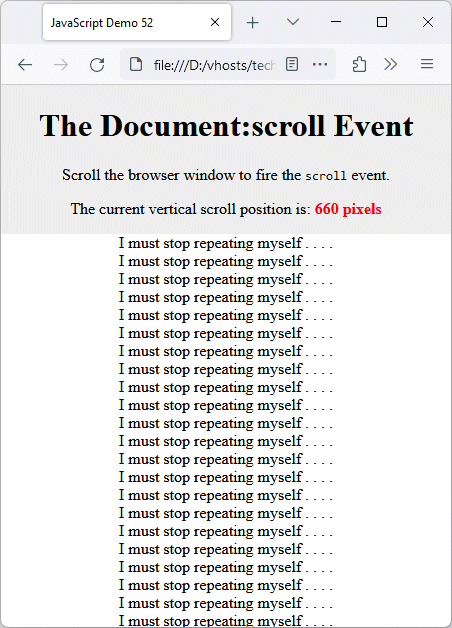
The scroll event fires multiple times as the user scrolls
The scroll event fires repeatedly as the user scrolls up and down the page. Each time it does, the event listener for the scroll event calls the getScrollPos() function, which retrieves the current value of the window.scrollY property and displays it in the document header. We have fixed the position of the <header> element within the viewport using CSS so that the user can see their vertical position within the document at any given time.
Being able to track your position in a lengthy document could be useful in terms of monitoring your progress, maybe by displaying a page number, or a progress bar of some kind located in a fixed header at the top of the document, much as we have done with our rudimentary position indicator.