Visual Basic Objects
Visual Basic is an object-oriented language. Forms are objects, as are the controls you place on a form. All objects have attributes (called properties), most have methods, and many have events. An object is a programming construct that encapsulates data and functionality in a single package, and which may only be accessed through interface elements (properties, methods and events) that are explicitly declared to be public.
Almost every element of a Visual Basic project is an object, including the forms and controls you have already encountered. Each type of object has a specific set of properties which can be examined by a program, and in many cases modified to change the state of the object.
Anything can be described in terms of its properties. An object of type FelisCatus, (otherwise known as a cat) for example, will have a name, be of a certain breed, and have specific colouring. The diagram below illustrates how we might represent the properties of a FelisCatus object. All objects of type FelisCatus will have these properties, but the value of each property will vary from one cat to another.
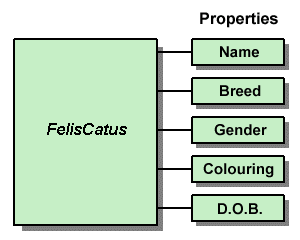
Properties are the attributes that describe something
Like the FelisCatus object, the form object in visual basic has many properties (e.g. name, height, width etc.) , all of which are shared by all Visual Basic forms. Different forms may have different values, however, for any of these properties.
While we can set the value of properties in the properties window when we are creating forms and controls, there will be many occasions when we want to change the value of one or more properties at run time (i.e. as the program is actually running).
If you had a button called btnClickMe, you could refer to the button's Text property in your code as shown below.
btnClickMe.Text = "Click me!"
This line of code would set the value of the button's Text property to "Click me!". When the property appears to the left of an assignment operator (the equals sign, "=") in this way, it is assigned whatever value the expression to the right of the assignment operator evaluates to. If the property appears to the right of the assignment operator, its value is assigned to the variable that appears to the left of the assignment operator.
Consider the following line of code:
strMyStringVar = btnClickMe.Text
Assuming the value of btnClickMe is "Click me!", the value of strMyStringVar will also become "Click me!" following the execution of this code.
Properties that can be read, but not changed, are known as read-only properties. Many properties that can be set in the properties window at design time become read-only when the program is actually running.
To demonstrate some of these points, we will now make some improvements to the ImageViewer project (see the page entitled 'Beyond "Hello World!"').
- Open the Image Viewer project.
- Add a new button to the form by double-clicking the Button tool in the toolbox. Set the new button's properties as follows:
| Property | Value |
|---|---|
| Name | btnBigger |
| Location | 312, 261 |
| Size | 31, 23 |
| Text | >> |
- Add a second new button with properties as follows:
| Property | Value |
|---|---|
| Name | btnSmaller |
| Location | 349, 261 |
| Size | 31, 23 |
| Text | << |
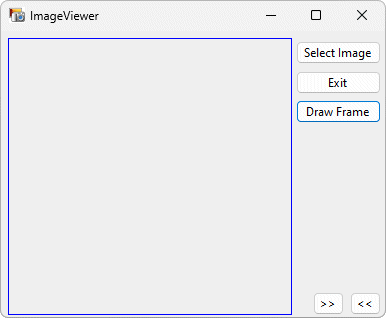
The form should now look like the illustration below.
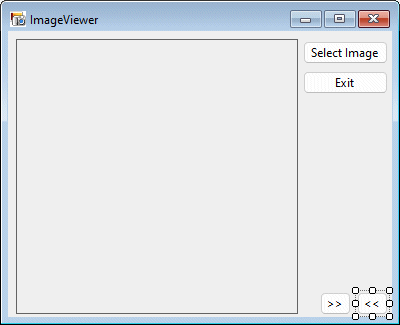
The updated form with its new buttons
- Double-click the >> button and add the following code:
Me.Width = Me.Width + 20
Me.Height = Me.Height + 20
- Display the form designer again, double-click the << button, and add the code below.
Me.Width = Me.Width - 20
Me.Height = Me.Height - 20
Me is a reserved word in Visual Basic that refers to the object in whose code module it appears. In this case, it is the form's code module, so the code for the >> button increases (or increments) the form's Width and Height properties by twenty pixels each, while the code for the << button decreases (or decrements) the form's Width and Height properties by twenty pixels each. Your code should now look like the illustration below.
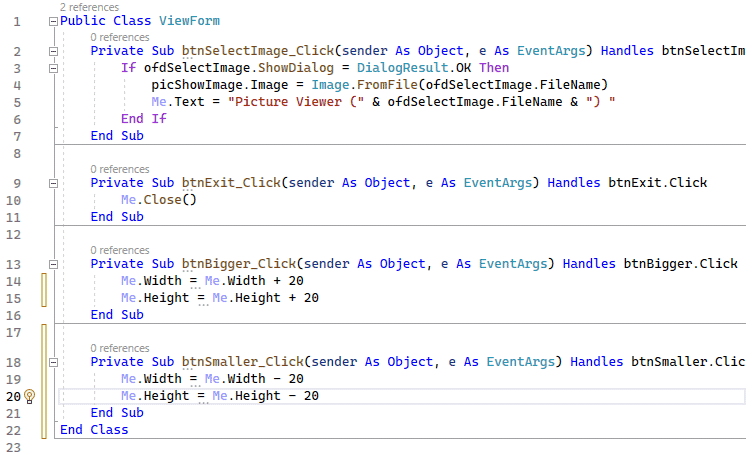
The code window should now look like this
Note the light bulb symbol that appears to the left of the last line of code entered (which only appears because, currently, the cursor is at the end of this line of code). This symbol appears when Visual Basic thinks there are potential issues to fix. In this case it could refer to several possible 'optimisations'. For example, you could have written the code using a compound operator, which would replace
Me.Height = Me.Height - 20
with
Me.Height -= 20
This kind of optimisation is favoured by many programmers and is perfectly legitimate, although when the code is compiled it will be optimised anyway by the compiler. Ultimately, how you write your code is usually a matter of personal preference unless there are specific guidelines in place that you are required to follow. If that is not the case, we suggest you pick a coding style with which you are comfortable and stick with it.
- Save your project by clicking the Save All button on the toolbar, display the form designer again and press F5 to run the program.
- Display a picture from your hard drive, and click on the >> button a couple of times. You should see something like the illustration below (notice that the form did indeed get bigger, but the image does not, and the buttons remain in their original positions).
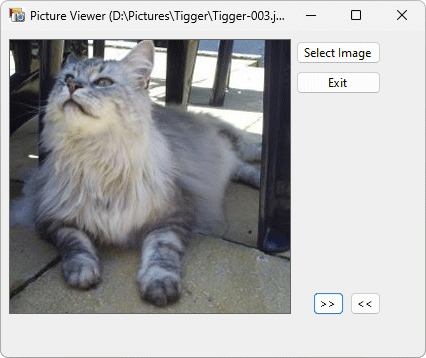
The form gets bigger, but the image does not change
- Now use the << button to restore the form to its original size, and return to the form designer by clicking on the Stop Debugging button on the toolbar (or you could just close the application).
Most objects have methods - actions the object can perform. A FelisCatus object has a certain set of actions that it can perform. These actions include miaowing, eating, and chasing birds.
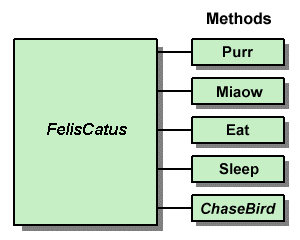
Methods are actions that the object can perform
Methods are procedures (usually function procedures). When you invoke a method, code is executed. You can pass arguments (parameters) to a method, and the method can return a value, although methods are neither required to accept parameters nor to return a value. Many methods simply perform some action. To make the hypothetical FelisCatus object Tiddles chase a bird, we might use the following line of code:
Tiddles.ChaseBird()
- Add a new button to the form, and set its properties as follows:
| Property | Value |
|---|---|
| Name | btnDrawFrame |
| Location | 295, 69 |
| Size | 85, 23 |
| Text | Draw Frame |
- Double-click the Draw Frame button to access its Click event, and add the following code:
Dim objGraphics As Graphics
objGraphics = Me.CreateGraphics
objGraphics.Clear (SystemColors.Control)
The first line of code creates a variable called objGraphics to hold an instance of an object of type Graphics. The second line calls one of the form's methods, CreateGraphics(). This method instantiates a new object that represents the client area (the area bounded by the form's borders and title bar) of the current form (referenced using the Me keyword).
The variable objGraphics has now been set to point at the object returned by the CreateGraphics() method, and anything drawn on it will appear on the form.
The third line calls the Clear() method (common to all graphics objects) of the objGraphics object to clear the form's background using whatever colour is currently set as the Windows Control colour (used by windows to paint forms). The only parameter passed to the Clear() method is the colour to be used to clear the control's surface.
- Now add the following statements to the Draw Frame button's Click event, immediately before End Sub statement:
objGraphics.DrawRectangle (System.Drawing.Pens.Blue,
picShowImage.Left - 1, picShowImage.Top - 1,
picShowImage.Width + 1, picShowImage.Height + 1)
picShowImage.Dispose()
The first statement (which we have split into three lines to make it more readable) draws a blue rectangle around the image on the form using the DrawRectangle() method, which accepts the following parameters:
- a pen
- the x coordinate of the top left-hand corner of the rectangle
- the y coordinate of the top left-hand corner of the rectangle
- the width of the rectangle
- the height of the rectangle
The attributes of the line, such as its colour, are determined by the pen specified in the first parameter passed to the method. The last line of code calls the picShowImage object's Dispose() method, which frees any resources the object is holding but no longer requires.
- Click on the Save All icon on the toolbar to save your work, run the program, and test the Draw Border button. Your form should look something like the illustration below.
Clicking on the Draw Frame button draws a border around the image
Related objects can be grouped together in a collection. Collections enable you to write code that will perform the same tasks for each of the objects in the collection using a loop construct, rather than having to write the code separately for each object.
A collection consists of an indexed set of objects, and may additionally have properties and methods in its own right. Indeed, all collections will have a Count property that returns the total number of objects in the collection. Collections may also have methods such as Add() and Delete(), to allow objects to be added to, or deleted from, the collection. Every form has a Controls collection (even if it has no controls).
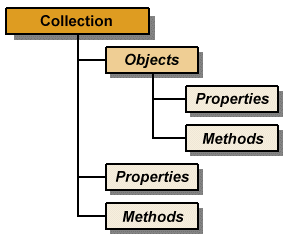
Collections contain objects, and have their own properties and methods
- Create a new project entitled "Collections".
- Change the form's filename to "CollectionsForm.vb" and set its Text property to "Collections".
- In the Solution Explorer window, right click on the project name ("Collections") and select Properties from the drop-down menu. The application's Properties window will appear. Scroll down to the Startup Object property, and use the drop-down menu to select Collections.CollectionsForm.
- Add a new button to the form and set its properties as shown below:
| Property | Value |
|---|---|
| Name | btnDisplayNames |
| Location | 83, 112 |
| Size | 140,23 |
| Text | Display Control Names |
- Add a few text box and label controls to the form, and give each one a different name (you can also resize the form if you wish).
- Double-click the Display Control Names button to access its Click event, and enter the code shown below.
Dim intCount As Integer
For intCount = 0 To Me.Controls.Count - 1
MessageBox.Show ("Control No. " & intCount & " is called " _
& Me.Controls (intCount).Name)
Next intCount
The first line of code creates an integer counter variable. The next line (the one that begins with For intCount . . .) initialises the counter variable to 0 and starts a loop. The counter is incremented by one each time the loop executes, until it equals the number of controls on the form minus one - the loop's exit condition (note that collections are indexed from zero). The MessageBox.Show() method displays a dialogue box with a text string (in this case created from concatenating several other text strings). Note that the code inside the For loop is a single statement (we'll talk more about loops elsewhere), but we have broken it into two lines using the underscore character for the sake of readability.
- Run the program and click on the Display Control Names button, then click on OK on the message box that pops up, after reading the message it displays. You should see a message box for each control on the form.

The Controls collection allows you to access each control on a form