In this page, we are going to create a simple address book database for personal and business contacts. The names and addresses will come from a Microsoft Access database (Contacts.accdb) which you can download from the link below. We will be using the wizards provided by Visual Basic to do most of the work, which means that there is relatively little programming required.
Download the Contacts.accdb database here
Important: In order for the application to work correctly, you will need to install SQL Server Express 2019 LocalDB (assuming you have not already done so). To do this, proceed as follows:
- Run the Visual Studio Installer application once more. You should see the following screen:
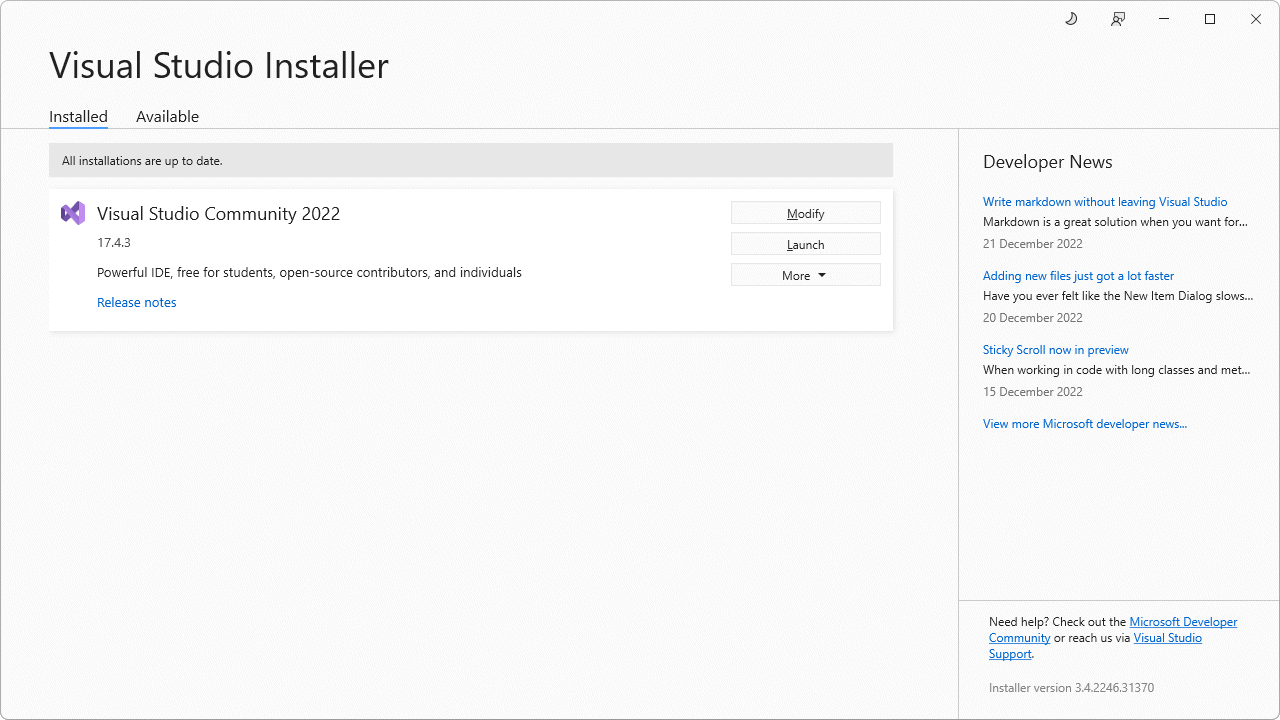
The Visual Studio Installer screen
- Click the Modify button. On the screen that appears (see below), the .Net desktop development option should be selected. Under "Installation details", check the box next to the SQL Server Express 2019 LocalDB option (you may need to scroll down the list to see it), and then click the Modify button. The required component will now be downloaded and installed. Once this process is complete, you can close the installer.
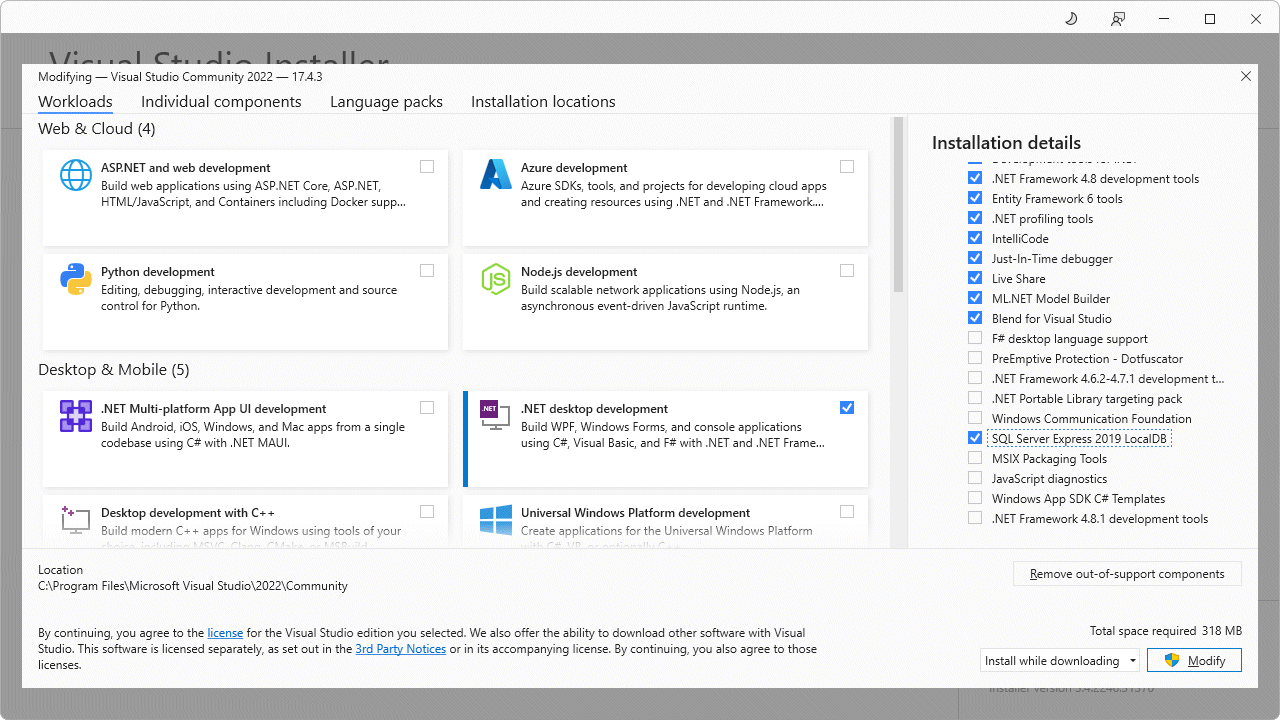
Check the SQL Server Express 2019 LocalDB option and click on the modify button
The technology used to interact with the Access database is Microsoft's ActiveX Data Objects (ADO). The ADO Base Class includes five major objects:
- Connection - the connection object stores information about the session and provides methods for connecting to a database (sometimes called a data store) . The Open method is used to open a connection with the data store, and requires a connection string that identifies the type of database (e.g. Microsoft Access) and the location of the database (a filename and path, or a URL). The connection object used is specific to a particular type of database.
- Command - the command object allows your program (among other things) to send SQL queries to the database.
- DataReader - this object provides a faster method of retrieving data from a data store than the DataSet (see below). It retrieves the records specified by an SQL query one row at a time. The retrieved data is read-only, and records can only be retrieved by the data reader object while the connection with the database remains open.
- DataSet - this is a group of database records, either taken directly from a table or created as the result of a database query, which is loaded into the application's memory space. The contents of the dataset can be manipulated using various commands. When you have finished working with a dataset (or at some intermediate point of your choosing), the amended dataset can be written back to the database.
- DataAdapter - the function of the data adapter object is to provide communication between a datasource and a dataset to allow the exchange of data between them. This usually involves reading data from a database into a dataset, or vice versa. The data adapter object used is typically optimised for a particular type of database (e.g. Microsoft Access, Oracle, and so on).
Using the Data Source Configuration wizard
We will use the Data Source Configuration wizard to create a program that reads the Contacts.accdb database and allows us to scroll through it and add to or edit its contents. The exercise demonstrates that you do not have to write any code or understand the precise way in which Visual Basic interacts with the database in order to create a simple database application.
- Open a new project, but this time select Widows Forms App (.Net Framework) from the Create a new project window, as per the illustration below (you may have to scroll down through quite a few options before you find it). Name your project "AddressBook".
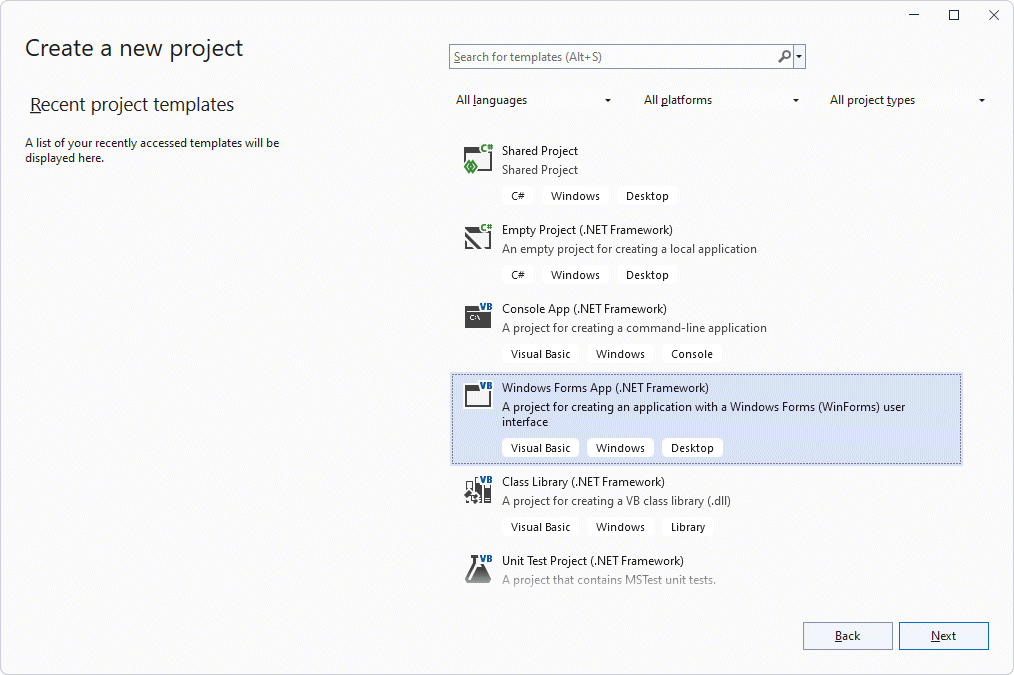
Select the Widows Forms App (.Net Framework) option
- Save the project immediately to create the project folder.
- If you have not already done so, download the Contacts.accdb database. Copy or save it to the \bin\Debug\ sub-directory of your project folder.
- Select Project ► Add New Data Source.... You should see the following screen:
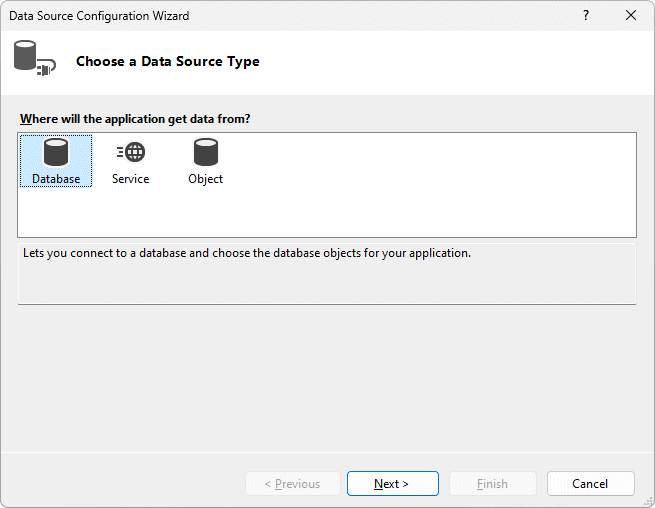
The Data Source Configuration wizard
- Make sure "Database" is selected, and click the Next button. You should see the following screen:
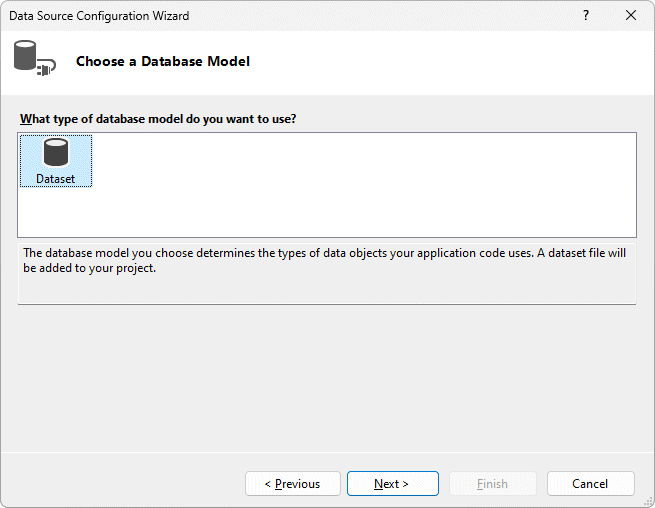
You will be asked to choose a database model
- Make sure the Dataset option is selected (as you can see from the illustration above, this may well be the only option available to you), and click the Next button. You should see the following screen:
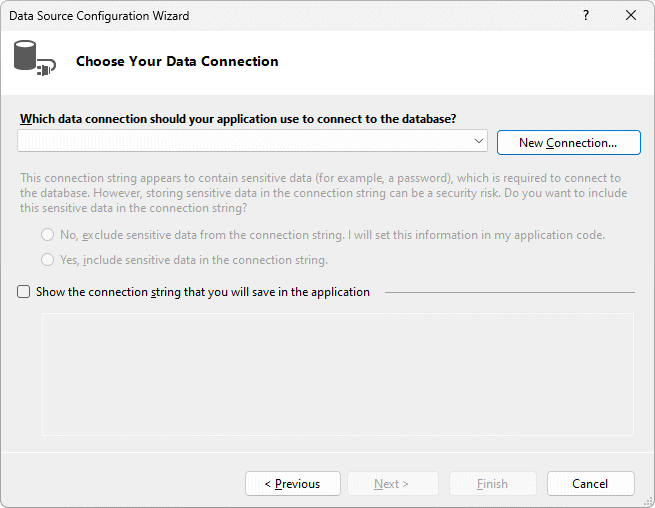
The wizard allows us to choose a data connection
- Click on the New Connection... button to bring up the following dialog box:
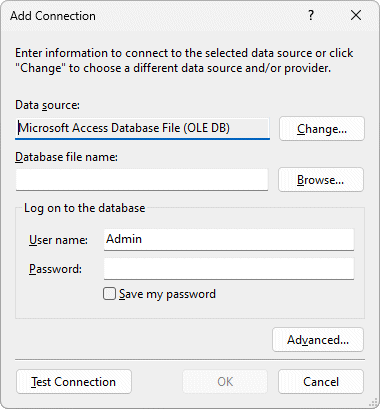
This dialog box allows us to choose the datasourcee type and database
- Make sure "Microsoft Access Database File" is selected, then click on the Browse button.
- Navigate to your project folder's \bin\Debug directory, and select the Access database file Contacts.accdb. You should now see the filename and path for the database appear in the dialogue box.
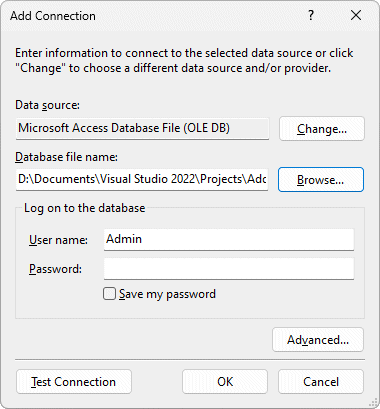
You should now see the filename and path for the database in the dialogue box
- Click on the Test Connection button to verify that the connection works*. You should see a meessage telling you that the test has succeeded. Click on OK.
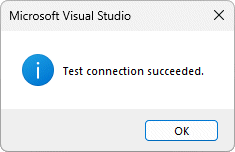
You should see a message telling you the test has succeeded.
* If you recieve a message saying "Unrecognised database format", you may need to download and install AccessDatabaseEngine.exe, and restart Visual Studio.
- Click on OK once more. You should now see the name of the database in the Data Source Configuration wizard.
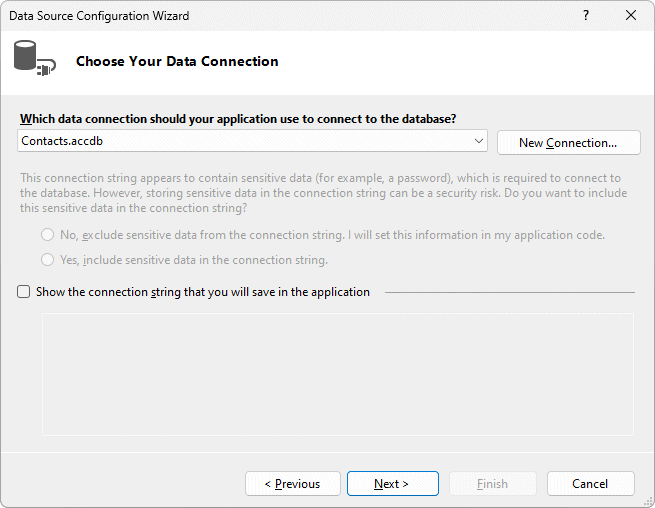
You should now see the name of the database in the Data Source Configuration wizard
- Click on the Next button. You will see the following message:
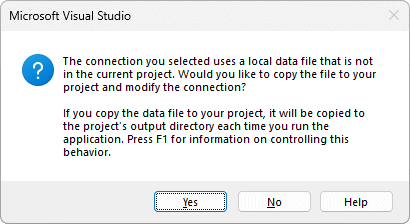
Copy the database file to your project
- Click Yes (the database file will be copied to your project folder). The Data Source Configuration wizard will now look like the illustration below.
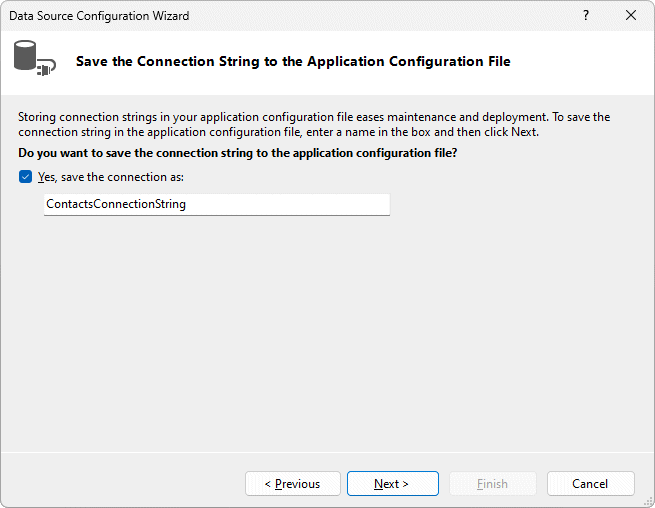
You should see the default name for the connection string
- Click on the Next button. The Data Source Configuration wizard will now look like the illustration below.
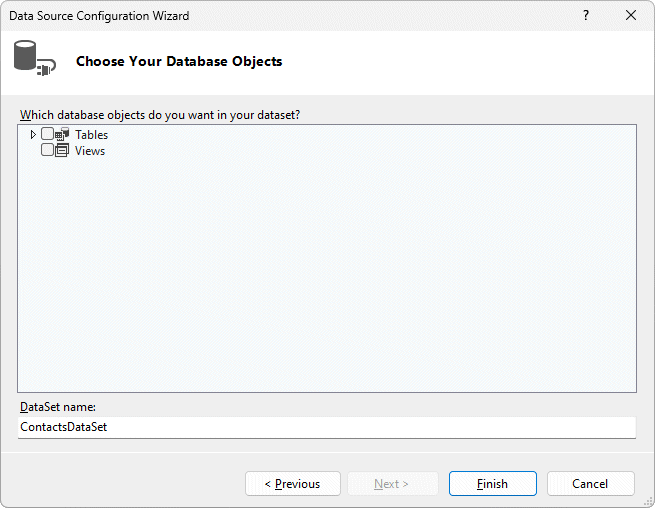
You can select the objects you want to be in the dataset
- Click on the right-facing arrow (▷) next to the Tables checkbox to expand the view, and click the checkbox itself. You should see that the Contact table is now selected. Click on the right-facing arrow next to the Contact table checkbox to expand the view once more. You should see that all of the table's fields have been selected.
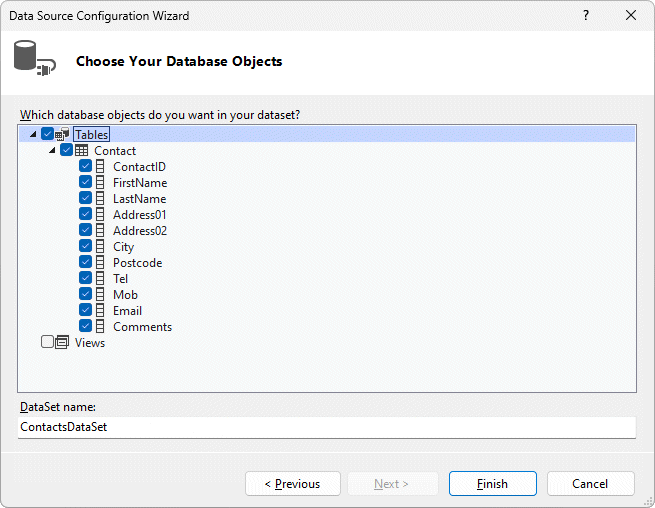
All of the fields in the Contact table are selected
- Click on the Finish button. Open the Data Sources pane by clicking on the Data Sources tab on the left hand side of the Visual Studio window (if the tab is not visible, click View ► Other Windows ► Data Sources). The Data Sources pane should now display information about the database, as shown below.
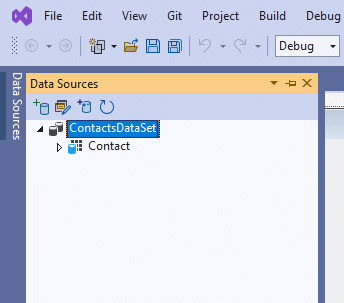
The Data Sources pane
- In the Data Sources pane, click the arrow (▷) next to Contact to see the available fields:
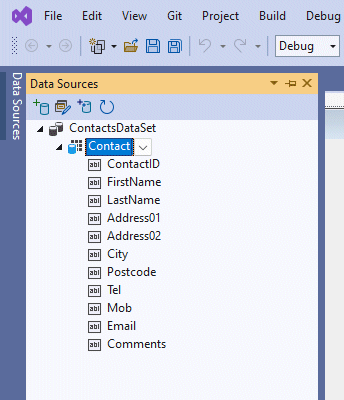
Expand the list to see the available data fields
Creating the form
We will now create the form controls that will allow us to look at the information in the database (if the Data Sources pane is not currently open, open it up again now).
- To add the FirstName field to the form, click on it in the list and drag it onto the form. This action not only creates a text box with a label, it also places a set of navigation controls at the top of the form, as shown below (note: if the Data Sources pane covers up the form when you open it, you can drag it into a different position or toggle its Auto Hide property until you are able to see both the form and the Data Sources pane).
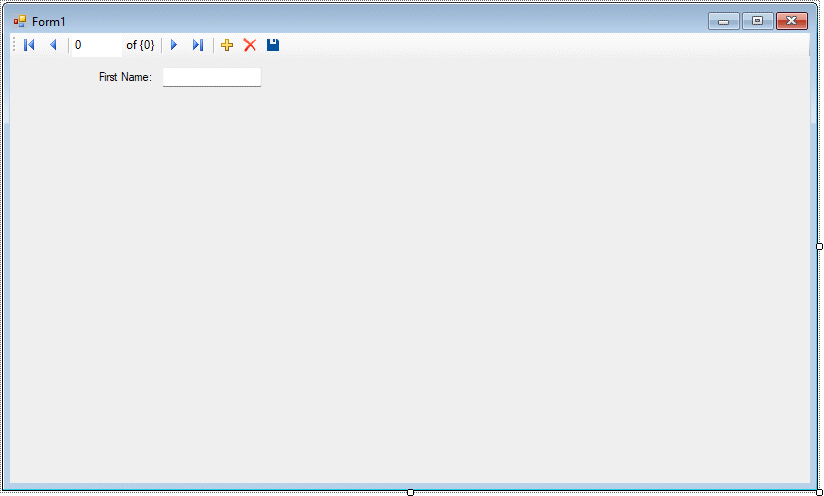
We have added a field (and some navigational controls) to the form
- Some other, unfamiliar objects appear at the bottom of the form design window (we will discuss how these are used elsewhere). For now, run the program and use the navigation controls to scroll through the databaseto get a feel for how they work, then close the application return to the form design window.
Note: You may get the error message "The 'Microsoft.ACE.OLEDB.12.0' provider is not registered on the local machine". If so, download and install AccessDatabaseEngine.exe, and restart Visual Studio.
- Drag the remaining fields onto the form (except for the ID field). Move them around and resize them until you are satisfied with the layout, and resize the form if required. Your form should now look (something) like this:
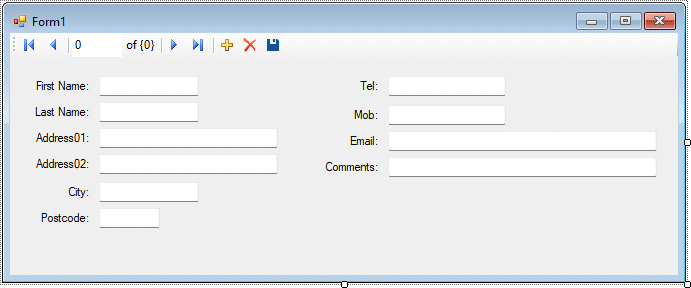
The form elements are all (approximately) in place
- Run the application again and use the navigation controls to test it. Your form should now be displaying all of the information in the database, and have the required basic functionality. You can probably think of a few cosmetic changes that would make the inteface look a little more professional.
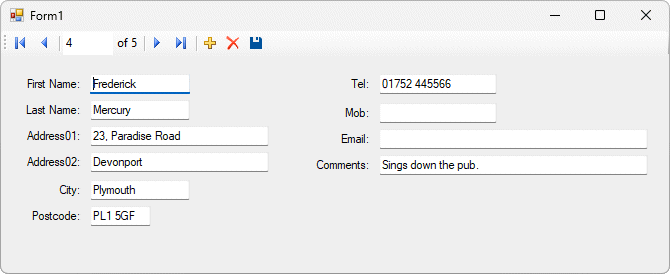
The basic application is now ready for use


