| Author: | |
| Website: | |
| Page title: | |
| URL: | |
| Published: | |
| Last revised: | |
| Accessed: |
The Oxford English Dictionary defines a list as "a number of connected items or names written or printed consecutively, typically one below the other". You can probably think of many different kinds of list. A shopping list is useful when you go to the supermarket. A "to do" list helps you remember all those jobs around the you promised to do. In fact, you probably come across lists of one kind or another several times a day. No wonder, then, that lists have been an integral part of HTML from the very beginning.
Lists are so commonplace in our everyday lives that HTML provides special list elements to enable us to easily insert lists in a web page. The two most commonly used list elements are the ordered list (<ol> … </ol>) and the unordered list (<ul> … </ul>). The main difference between them is that, by default, the items in an ordered list are sequentially numbered, whereas the items in an unordered list are bulleted.
Regardless of whether we are creating an ordered or an unordered list, we will use the HTML list item element (<li> … </li>) to create each entry in the list. List items are enclosed between the opening and closing tags of the list element. Whether the list items are prefixed with numbers or bullet points will be determined by the kind of list element we use.
HTML also provides a third kind of list element called a description list (sometimes called a definition list) which has its own special tag set (<dl> … </dl>). A description list contains one or more key-value pairs. In its simplest form, a key value pair will consist of a description list term element (<dt> … </dt>) that specifies a single term, and a corresponding description list detail element (<dd> … </dd>) that provides a description of the term.
We can also apply styles to HTML lists in a number of interesting ways to enhance both their aesthetic qualities and their functionality. Styles can be used, for example, to change the appearance of the list item marker, adjust the degree to which list items are indented, or change the line spacing between list elements. We will be investigating the many ways in which lists can be styled in the section "Introduction to CSS"
An unordered list consists, by default, of a series of bulleted items, each of which is indented slightly from the page margin. The following HTML code creates a web page containing a list of ingredients for traditional Lancashire Hotpot (source: the BBC Good Food website):
<!doctype html>
<html lang="en">
<head>
<meta charset="utf-8">
<title>Lancashire Hotpot Recipe</title>
</head>
<body>
<div style="text-align: center;">
<h1>A Lancashire Hotpot Recipe</h1>
<p><small>Source: <a href="https://www.bbcgoodfood.com/recipes/9099/lancashire-hotpot" target="_blank">BBC Good Food</a></small></p>
<img src="https://www.technologyuk.net/assets/demo-images/lancashire_hotpot.jpg" alt="A picture of a Lancashire Hotpot">
<p><small>Lancashire hotpot - a stew originating from Lancashire</small></p>
<h2>Ingredients:</h2>
<div style="display: inline-block; text-align: left;">
<ul>
<li>100g dripping or butter</li>
<li>900g stewing lamb, cut into large chunks</li>
<li>3 lamb kidneys, sliced, fat removed</li>
<li>2 medium onions, chopped</li>
<li>4 carrots, peeled and sliced</li>
<li>25g plain flour</li>
<li>2 tsp Worcestershire sauce</li>
<li>500ml lamb or chicken stock</li>
<li>2 bay leaves</li>
<li>900g potato, peeled and sliced</li>
</ul>
</div>
</div>
</body>
</html>
Copy and paste this code into a new file in your HTML editor, save the file as list-demo-01.html, and open the file in a web browser. You should see something like the following:
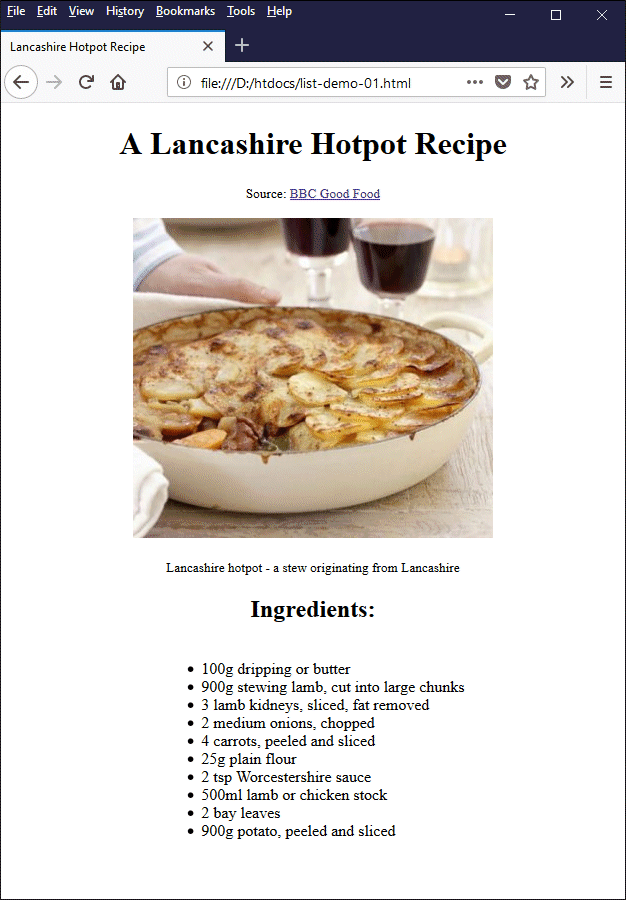
A web page containing a list of ingredients as an unordered list
Unordered lists are routinely used to create lists of items for which the order in which the items appear is unimportant. The order in which the items in our list of ingredients appears is not particularly important. If we are going to make Lancashire Hotpot, we just need to ensure that we have all the items on the list before we start. When it comes to actually doing something with the ingredients, however, it's a different story.
Let's suppose that we have purchased all of the ingredients we need to make Lancashire Hotpot - We have gathered them all together in our kitchen, have done all the necessary chopping and slicing (hopefully with all fingers still attached!) and are ready to proceed. From now on, we are going to have to follow a set of instructions in the order in which those instructions have been written. In short, we need an ordered list.
The following HTML code is the same as the code we saw above, except that we have now added an ordered list that contains all of the instructions necessary to actually make our Lancashire Hotpot:
<!doctype html>
<html lang="en">
<head>
<meta charset="utf-8">
<title>Lancashire Hotpot Recipe</title>
</head>
<body>
<div style="text-align: center;">
<h1>A Lancashire Hotpot Recipe</h1>
<p><small>Source: <a href="https://www.bbcgoodfood.com/recipes/9099/lancashire-hotpot" target="_blank">BBC Good Food</a></small></p>
<img src="https://www.technologyuk.net/assets/demo-images/lancashire_hotpot.jpg" alt="A picture of a Lancashire Hotpot">
<p><small>Lancashire hotpot - a stew originating from Lancashire</small></p>
<h2>Ingredients:</h2>
<div style="display: inline-block; text-align: left;">
<ul>
<li>100g dripping or butter</li>
<li>900g stewing lamb, cut into large chunks</li>
<li>3 lamb kidneys, sliced, fat removed</li>
<li>2 medium onions, chopped</li>
<li>4 carrots, peeled and sliced</li>
<li>25g plain flour</li>
<li>2 tsp Worcestershire sauce</li>
<li>500ml lamb or chicken stock</li>
<li>2 bay leaves</li>
<li>900g potato, peeled and sliced</li>
</ul>
</div>
<h2>Method:</h2>
<div style="display: inline-block; text-align: left;">
<ol>
<li>Heat oven to 160C/fan 140C/gas 3.</li>
<li>Heat a little of the 100g dripping or butter in a large shallow casserole dish and brown 900g stewing lamb chunks in batches, lift to a plate, then repeat with 3 trimmed and sliced lamb kidneys.</li>
<li>Fry 2 chopped onions and 4 peeled and sliced carrots in the pan with a little more dripping until golden.</li>
<li>Sprinkle over 25g plain flour, allow to cook for a couple of mins, shake over 2 tsp Worcestershire sauce, pour in 500ml lamb or chicken stock, then bring to the boil.</li>
<li>Stir in the stewing lamb and kidneys and 2 bay leaves, then turn off the heat.</li>
<li>Arrange 900g peeled and sliced potatoes on top of the meat, then drizzle with a little more dripping.</li>
<li>Cover, then place in the oven for about 1½ hrs until the potatoes are cooked.</li>
<li>Remove the lid, brush the potatoes with a little more dripping, then turn the oven up to brown the potatoes, or finish under the grill for 5-8 mins until brown.</li>
</ol>
</div>
</div>
</body>
</html>
Copy and paste this code into a new file in your HTML editor, save the file as list-demo-02.html, and open the file in a web browser. You should see something like the following:
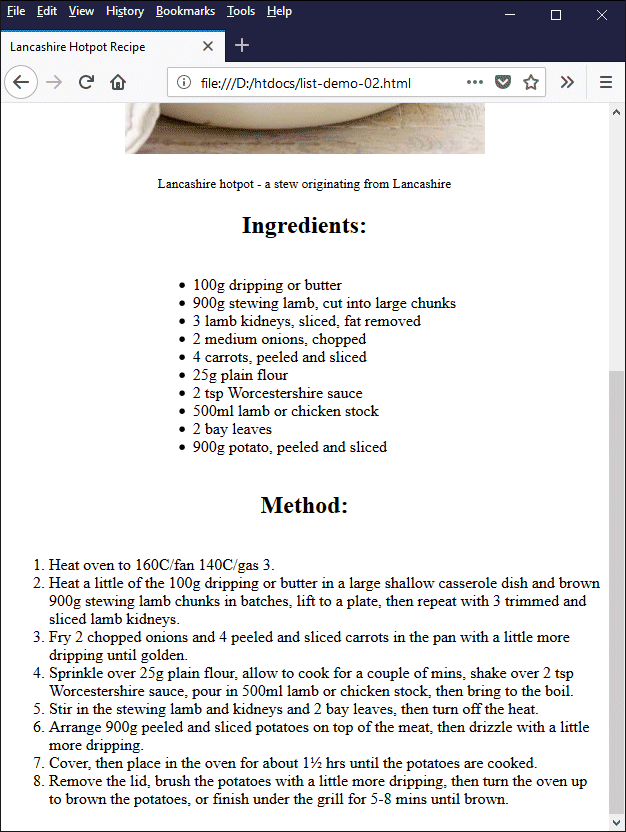
The instructions for cooking the hotpot are shown as an ordered list
Ordered lists are used to create lists of items for which the order in which the items appear is important. Obviously, the order in which we carry out a set of instructions for cooking a particular dish or assembling an item of flat-packed furniture is very important if we want to achieve a satisfactory outcome. It can even be critical if we are doing something more high-risk, like carrying out a medical procedure.
There are several attributes that we can use with ordered lists to change their appearance, according to our requirements. The first of these attributes is the type attribute, which defines the type of the list item marker (the unique list item identifier that appears in front of the list item text). By default, the list item marker is a number. There are other options available, however, as shown in the following table:
| Type | Description |
|---|---|
| type="1" | List items are prefixed with numbers (the default). |
| type="A" | List items are prefixed with upper-case letters. |
| type="a" | List items are prefixed with lower-case letters. |
| type="I" | List items are prefixed with upper-case Roman numerals. |
| type="i" | List items are prefixed with lower-case Roman numerals. |
The HTML code below creates a web page that shows three different kinds of list. Each list uses a different value for the type attribute. The first is a numbered list showing the five largest countries in the world by land mass. The second shows the first five Roman emperors and (rather aptly we thought) uses upper-case Roman numerals. The final list shows the six categories of fire defined in the European Standard Classification of Fires.
<!doctype html>
<html lang="en">
<head>
<meta charset="utf-8">
<title>List Demo 3</title>
</head>
<body>
<div style="text-align: center;">
<h1>List Demo 3</h1>
<h2>The five largest countries:</h2>
<div style="display: inline-block; text-align: left;">
<ol type="1">
<li>Russia</li>
<li>Canada</li>
<li>United States</li>
<li>China</li>
<li>Brazil</li>
</ol>
</div>
<hr>
<h2>The Julian-Claudian Dynasty 27 BC - AD 68:</h2>
<div style="display: inline-block; text-align: left;">
<ol type="I">
<li>Augustus Caesar (Emperor) - 27 BC to 14 AD</li>
<li>Tiberius (Emperor) - 14 AD to 37 AD</li>
<li>Caligula (Emperor) - 37 AD to 41 AD</li>
<li>Claudius (Emperor) - 41 AD to 54 AD</li>
<li>Nero (Emperor) - 54 BC AD 68 AD</li>
</ol>
</div>
<hr>
<h2>Categories of Fire:</h2>
<div style="display: inline-block; text-align: left;">
<ol type="A">
<li>Fires involving solid materials (e.g. wood, paper, textiles)</li>
<li>Fires involving flammable liquids (e.g. petrol, diesel, oil)</li>
<li>Fires involving flammable gases (e.g. butane, propane)</li>
<li>Fires involving flammable metals (e,g, magnesium, sodium)</li>
<li>Electrical fires*</li>
<li>Cooking oil fires</li>
</ol>
</div>
<p>
* There is officially no category E as such. It is used here for convenience
</p>
</div>
</body>
</html>
Copy and paste this code into a new file in your HTML editor, save the file as list-demo-03.html, and open the file in a web browser. You should see something like the following:
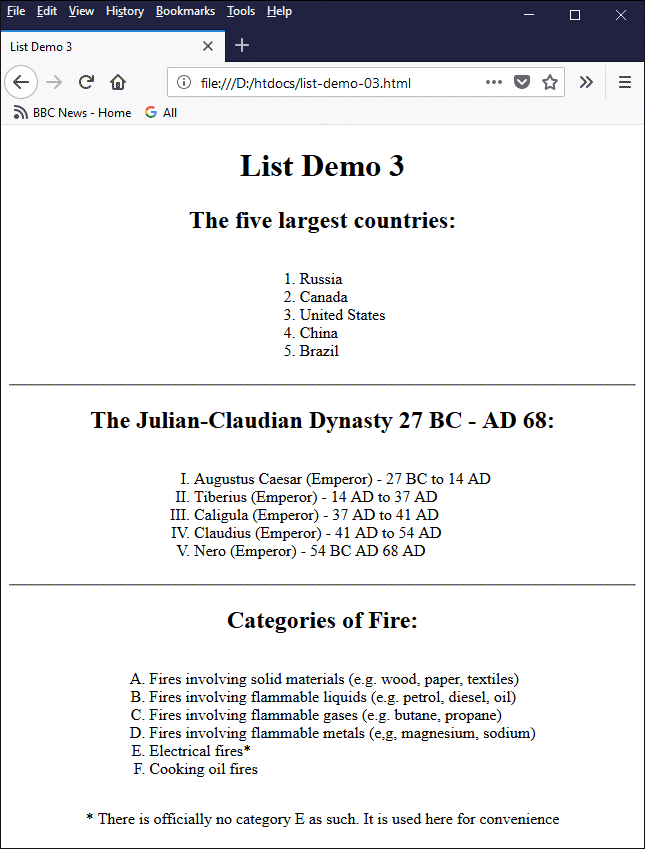
This web page demonstrates the effect of using different values for the list type attribute
When working with ordered lists, the question of which value to use for the type attribute must be determined on a case-by-case basis. For lists that must be numbered, it is not necessary to specify a value at all, since ordered lists are numbered by default. Upper and lower-case Roman numerals and letters tend to be used only for certain kinds of list; you will have to decide for yourself whether or not their use is appropriate in a given situation.
Another attribute that we sometimes use with ordered lists is the start attribute. This attribute allows us to define the number (or roman numeral or letter) from which an ordered list starts. This is very useful when we want to break an ordered list up into discontinuous blocks.
For example, we might want to insert an image, a block of text, or some other element at some point within our list for illustrative purposes. We don't really want this additional material to be part of our list, but at the same time we want the continuation of our list to start at the number that follows on from the previous part of the list rather than starting again from 1.
The HTML code below creates a web page that lists ten of the longest bridges in Europe. The HTML code in fact contains two ordered list elements separated by an image (a photograph of one of the bridges). The first ordered list element contains three list items, numbered 1, 2 and 3. For the second ordered list element, we have used the start attribute and set its value to "4" in order to ensure that the numbering resumes at 4 instead of restarting from 1.
<!doctype html>
<html lang="en">
<head>
<meta charset="utf-8">
<title>List Demo 4</title>
</head>
<body>
<h1 style="text-align: center;">Europe's Longest Bridges</h1>
<p>
The longest bridge of any kind in the world is undoubtedly China's 164,800 m long <em>Danyang–Kunshan Grand Bridge</em>, a high-speed railway bridge completed in 2010 as part of the Beijing–Shanghai High-Speed Railway. In fact, China is home to many of the world's longest bridges. Europe has its fair share of long bridges too, however. Ten of Europe's longest bridges are listed below.
</p>
<div style="text-align: center;">
<div style="display: inline-block; text-align: left; width: 75%;">
<ol>
<li><strong><em>Vasco da Gama Bridge (Portugal, 12,345 m)</em></strong> - completed in 1998, this road bridge is the longest bridge entirely within Europe.</li>
<li><strong><em>Lezíria Bridge (Portugal, 11,670 m)</em></strong> - a road bridge completed in 2007.</li>
<li><strong><em>Öresund Bridge (Denmark-Sweden, 7845 m)</em></strong> - a combined railway and road bridge spanning part of the Øresund strait between Sweden and Denmark.</li>
</ol>
</div>
</div>
<div style="text-align: center;">
<br>
<img src="https://www.technologyuk.net/assets/demo-images/oeresund_bridge.jpg" alt="Öresund Bridge (Denmark-Sweden, 7845 m)" style="max-width: 75%;">
<p><small>Öresund Bridge (Denmark-Sweden, 7845 m)<br>Photo credit: Daniel Karlsson</small></p>
</div>
<div style="text-align: center;">
<div style="display: inline-block; text-align: left; width: 75%;">
<ol start="4">
<li><strong><em>Great Belt Bridge - Eastern (Denmark, 6,790 m)</em></strong> - completed in 1998, this suspension bridge between Halsskov and Sprogø carries road traffic and boasts the world's third-longest suspension bridge span (1,624 m).</li>
<li><strong><em>Great Belt Bridge - Western (Denmark, 6,611 m)</em></strong> - completed in 1998, this box girder bridge between Sprogø and Knudshoved carries road and rail traffic (it actually consists of two separate but adjacent bridges, on for road traffic and one for rail).</li>
<li><strong><em>Saale-Elster Viaduct (Germany, 6,465 m)</em></strong> - a railway bridge completed in 2013 as part of the Erfurt-Leipzig/Halle high-speed railway.</li>
<li><strong><em>Öland bridge (Sweden, 6,072 m)</em></strong> - this road bridge that connects Kalmar on mainland Sweden to Färjestaden on the island of Öland.</li>
<li><strong><em>Bromford Viaduct (United Kingdom, 5,600 m)</em></strong> - this viaduct, completed in 1971, carries motorway traffic between the Castle Bromwich and Gravelly Hill junctions of the M6 motorway that runs through Birmingham.</li>
<li><strong><em>Second Severn Crossing (United Kingdom, 5,128 m)</em></strong> - completed in 1996, this motorway bridge over the River Severn between England and Wales was designed to carry more traffic than the original Severn Bridge (still in use) which was built in 1966. It was renamed the Prince of Wales Bridge in 2018.</li>
<li><strong><em>Köhlbrandbrücke (Germany, 4088 m)</em></strong> - this bridge in Hamburg, completed in 1974, connects the harbor area on the island of Wilhelmsburg with the Waltershof exit of motorway 7.</li>
</ol>
</div>
</div>
</body>
</html>
Copy and paste this code into a new file in your HTML editor, save the file as list-demo-04.html, and open the file in a web browser. You should see something like the following:
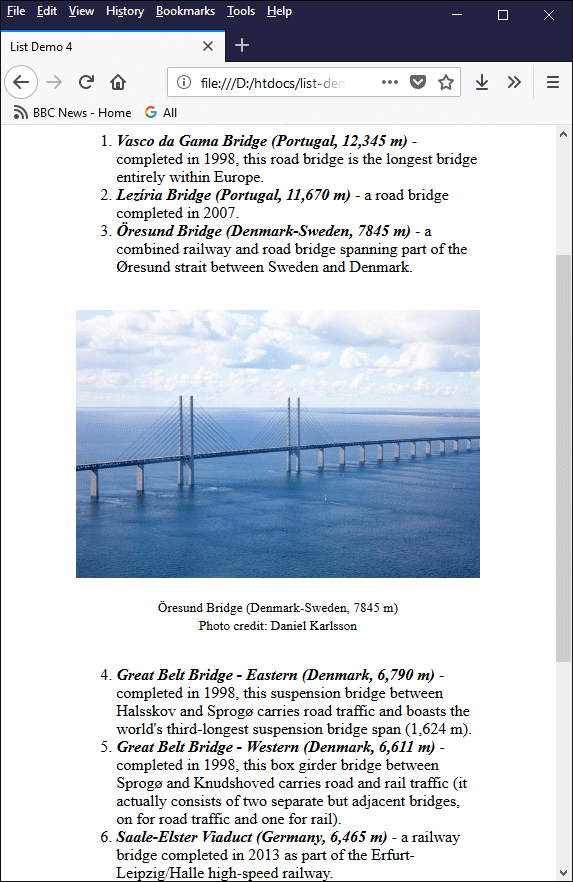
The start attribute allows us to set the number of the first item in an ordered list
Note that the start attribute can be used with each of the different list types that can be specified using the type attribute, including upper and lower-case letters. The value of the start attribute must always be set to an integer value, and can be positive, negative or zero for the default type (type="1"). For all other values of type, only positive integers may be used for the start attribute. The following examples demonstrate how this works:
<ol type = "1" start = "5"> - The numbering starts from 5
<ol type = "1" start = "0"> - The numbering starts from 0
<ol type = "1" start = "-5"> - The numbering starts from -5
<ol type = "I" start = "7"> - Numerals starts from VII.
<ol type = "i" start = "8"> - Numerals starts from viii.
<ol type = "a" start = "3"> - Letters starts from c.
<ol type = "A" start = "6"> - Letters starts from F.
Note also that if letters of the alphabet are used as the list index, and the number of items in the list exceeds the number of letters in the alphabet, the indexing sequence starts again at the beginning of the alphabet except that this time each character is prefixed with "A" or "a" (depending on the value of the type attribute). The following HTML code creates a simple web page that demonstrates this point:
<!doctype html>
<html lang="en">
<head>
<meta charset="utf-8">
<title>List Demo 5</title>
</head>
<body>
<div style="text-align: center;">
<h1>List Demo 5</h1>
<h2>This list's index has a start value of 24:</h2>
<div style="display: inline-block; text-align: left;">
<ol type="A" start="24">
<li>List item one</li>
<li>List item two</li>
<li>List item three</li>
<li>List item four</li>
<li>List item five</li>
<li>List item six</li>
</ol>
</div>
</div>
</body>
</html>
Copy and paste this code into a new file in your HTML editor, save the file as list-demo-05.html, and open the file in a web browser. You should see something like the following:
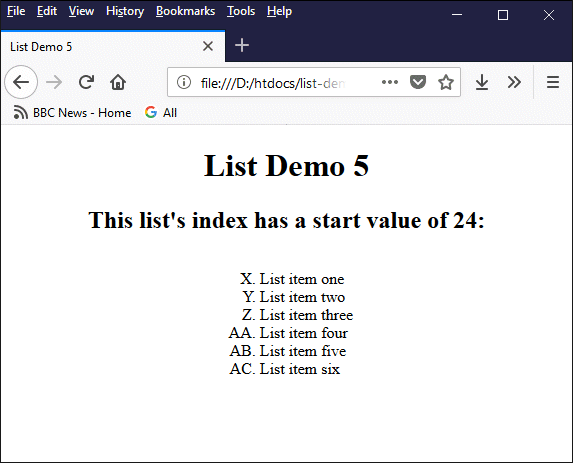
Alphabetical indexing continues from the end of the alphabet using a two-character value
If the list continued to the end of the alphabet for a second time, the sequence would restart at "A" once more, with each character this time being prefixed with "B". This pattern could, in theory, be repeated indefinitely, although it would eventually become somewhat unwieldy.
Letters are probably only really suitable for relatively short lists. The same applies to roman numerals, which can also become somewhat unwieldy when larger index numbers are involved. If we changed the value of the type attribute for the last example to "I", we would see something like this:
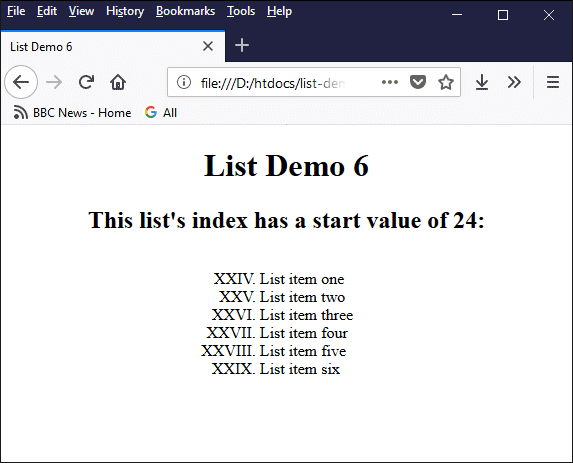
Roman numerals with large values can become somewhat unwieldy
The final attribute we shall look at in connection with ordered lists is the reversed attribute. This attribute, as the name suggests, allows us to reverse the order in which the list will be indexed. The first list item in the list will have the highest number, and the last list item will have the lowest number (note that Microsoft browsers, for reasons best known to Microsoft, do not appear to support this attribute).
Note that the reversed attribute can be used with both the start attribute and the type attribute, although the same restrictions apply to index values of zero or less (i.e. negative integer values) as were described above. In other words, list elements that are indexed with upper or lower-case letters or Roman numerals must be indexed using positive integers in order to avoid anomalous results.
The reversed attribute can be used to create "countdown lists" of the kind you might see on a certain kind of web page. For example, a web page entitled "The Best 100 Sci-fi Movies of All time" would probably list the movies in reverse order of merit - saving the best for last, so to speak. The following HTML code creates a page that lists the countries with the largest populations in reverse order of population size:
<!doctype html>
<html lang="en">
<head>
<meta charset="utf-8">
<title>List Demo 7</title>
</head>
<body>
<div style="text-align: center;">
<h1>10 Highest Populations</h1>
<div style="display: inline-block; text-align: left;">
<ol reversed="reversed">
<li>Japan (126,168,156)</li>
<li>Russia (142,122,776)</li>
<li>Bangladesh (159,453,001)</li>
<li>Nigeria (203,452,505)</li>
<li>Pakistan (207,862,518)</li>
<li>Brazil (208,846,892)</li>
<li>Indonesia (262,787,403)</li>
<li>United States (329,256,465)</li>
<li>India (1,296,834,042)</li>
<li>China (1,384,688,986)</li>
</ol>
</div>
<p><small>Source: U.S. Census Bureau Current Population, 30-09-2018</small></p>
</div>
</body>
</html>
Copy and paste this code into a new file in your HTML editor, save the file as list-demo-07.html, and open the file in a web browser. You should see something like the following:
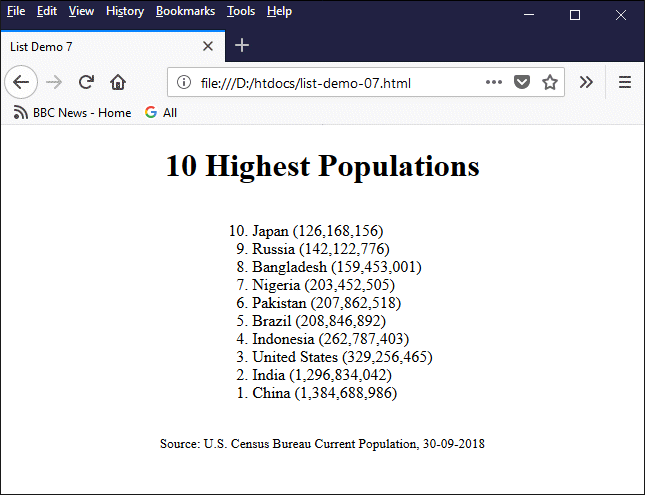
The reversed attribute can be used to create a “countdown list”
A nested list, as the name suggests, is a list nested inside another list. Nested lists are often used to create navigation menus because they can mirror the hierarchical structure of a website. They are also useful for creating a list of high-level items, each of which can be broken down into a number of lower-level components, like the chapters, sections and sub-sections of a text-book.
W3C does not, as far as we can ascertain, specify a limit on the depth to which lists can be nested. In theory, lists can be nested indefinitely, although in practical terms you should probably try to avoid nesting lists any deeper than three levels.
The HTML code below creates a web page that lists the first two driving licence categories currently defined by the UK government (mopeds and motorcycles). Categories within each section are defined using nested lists. Qualifying statements within each category are defined using a second level of nesting.
<!doctype html>
<html lang="en">
<head>
<meta charset="utf-8">
<title>List Demo 8</title>
</head>
<body>
<div style="text-align: center;">
<h1>UK Driving Licence Categories<br><small>(Mopeds and Motorcycles)</small></h1>
<div style="display: inline-block; text-align: left;">
<ul>
<li><h2>Mopeds</h2>
<ul>
<li>
<h3>Category AM</h3>
2-wheeled or 3-wheeled vehicles with a maximum design speed of over 25km/h (15.5mph) but not more than 45km/h (28mph).<br>
Includes light quad bikes with:
<ul>
<li>unladen mass of not more than 350kg (not including batteries if it's an electric vehicle)</li>
<li>maximum design speed of over 25km/h (15.5mph) but not more than 45km/h (28mph)</li>
</ul>
</li>
<li>
<h3>Category P</h3>
2-wheeled vehicles with a maximum design speed of over 45km/h (28mph) but not more than 50km/h (31mph).<br>
Engine size must not be more than 50cc if powered by an internal combustion engine.
</li>
<li>
<h3>Category Q</h3>
2-wheeled vehicles with:
<ul>
<li>an engine size not more than 50cc if powered by an internal combustion engine</li>
<li>a maximum design speed of no more than 25km/h (15.5mph)</li>
</ul>
</li>
</ul>
</li>
<li><h2>Motorcycles</h2>
<ul>
<li>
<h3>Category A1</h3>
Light motorbikes with:
<ul>
<li>an engine size up to 125cc</li>
<li>a power output of up to 11kW</li>
<li>a power to weight ratio not more than 0.1kW/kg</li>
</ul>
This category also includes motor tricycles with power output up to 15kW.
</li>
<li>
<h3>Category A2</h3>
Motorbikes with a:
<ul>
<li>power output up to 35kW</li>
<li>power to weight ratio not more than 0.2kW/kg</li>
</ul>
The motorbike must also not be derived from a vehicle of more than double its power.<br>
You can also drive motorbikes in category A1.
</li>
<li>
<h3>Category A</h3>
You can drive:
<ul>
<li>Motorbikes with a power output more than 35kW or a power to weight ratio more than 0.2kW/kg</li>
<li>Motor tricycles with a power output more than 15kW</li>
</ul>
You can also drive motorbikes in categories A1 and A2.<br>
</li>
</ul>
</li>
</ul>
</div>
<p><small>Source: <a href="https://www.gov.uk/driving-licence-categories" target="_blank">https://www.gov.uk/driving-licence-categories</a></small></p>
</div>
</body>
</html>
Copy and paste this code into a new file in your HTML editor, save the file as list-demo-08.html, and open the file in a web browser. You should see something like the following:
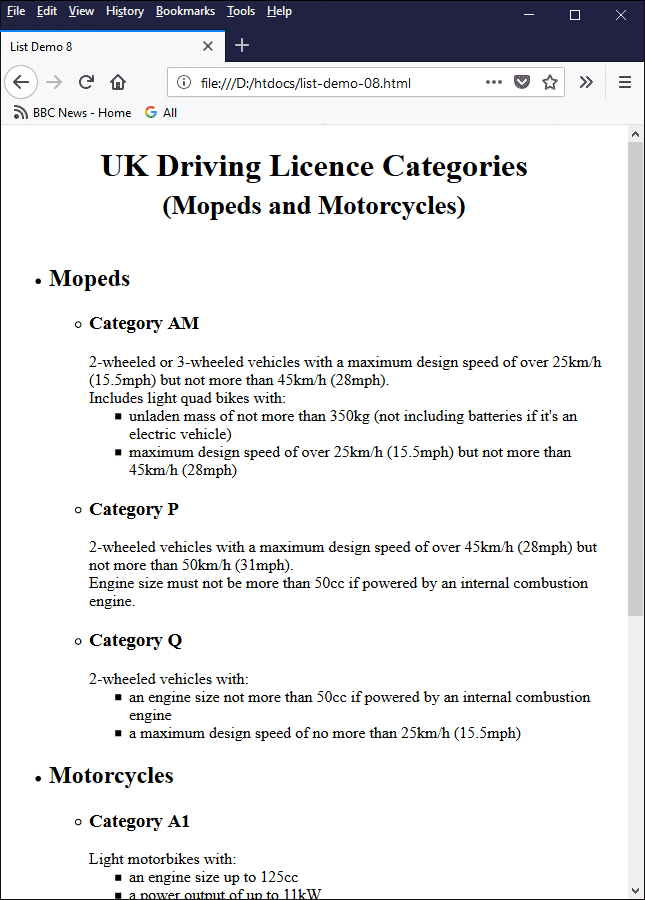
A nested list displaying vehicle licencing categories and sub categories
There are a couple of things to note from the above example. First, we have used both level 2 and level 3 headings (<h2> and <h3>) inside a list element. This is perfectly OK. In fact, you can enclose almost any HTML element within a list item element, including an image.
Second, note carefully the structure used for nesting lists. A nested list must be placed between the opening and closing tags (<li> … </li>) of one of the list item elements in its parent list. A common mistake is to place a nested list between two consecutive list item elements. Doing so can have unpredictable consequences (the page may even be rendered correctly in some browsers, but it won’t be valid HTML).
When nesting lists, you can use both ordered and unordered lists together, in any order, as long as the end result makes sense. An HTML validator won’t care about this last point but your visitors probably will! You can also apply different values for the type attribute to the lists in your nested structure, but again, you should only do so in a way that makes sense.
The precise way in which lists are rendered by a browser will depend on the particular browser implementation, but most browsers adopt more or less the same conventions. For example, lists are indented from the page margin to distinguish them from the main text of the page. In addition, a nested list will usually be indented to a greater degree than its parent list to highlight the fact that it is a child of that list.
Finally, as you may have noticed, lists at different levels of nesting have, by default, distinctly different types of list item marker. At the highest level, the marker for each list item is a solid black disk (•). At the first level of nesting, the list item marker becomes a circle (◦); and at the second level of nesting, the list item marker is a filled square (▪).
Another list type, although not so commonly used, is the description list. A description list element is defined using the <dl> … </dl> tag set. Each list item within a description list consists of two different types of object – one or more description list term (enclosed within the <dt> … </dt> tag set), followed by one or more description list detail (enclosed within the <dd> … </dd> tag set). The following HTML code demonstrates how a definition list might me used:
<!doctype html>
<html lang="en">
<head>
<meta charset="utf-8">
<title>List Demo 9</title>
</head>
<body>
<div style="text-align: center;">
<h1>Common Household Pets</h1>
<div style="display: inline-block; text-align: left;">
<dl>
<dt><strong><em>Canis lupus familiaris</em></strong></dt>
<dd><small>Domestic dog - a highly variable mammal closely related to the gray wolf.</small></dd>
<dt><strong><em>Felis silvestris catus</em></strong></dt>
<dd><small>Domestic cat - a small, predatory feline mammal.</small></dd>
<dt><strong><em>Oryctolagus cuniculus domesticus</em></strong></dt>
<dd><small>Domestic rabbit - a small plant-eating mammal with long ears, long hind legs, and a short tail.</small></dd>
<dt><strong><em>Cavia porcellus</em></strong></dt>
<dd><small>Domestic guinea pig - a small stout-bodied short-eared tailless domesticated rodent of South American origin.</small></dd>
</dl>
</div>
</div>
</body>
</html>
Copy and paste this code into a new file in your HTML editor, save the file as list-demo-09.html, and open the file in a web browser. You should see something like the following:
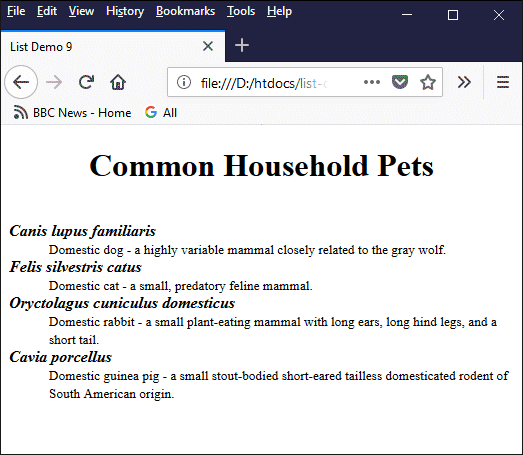
A simple definition list
As you can see, the description list, when displayed in a browser, looks a little like a series of entries in a dictionary or encyclopaedia. Although we have added some formatting to the description list (italicising and emboldening the description list term and reducing the font size of the description list detail), the indentation of the description list detail is added by the browser.
You could of course achieve similar results using standard text using styles, but the semantics (meaning and purpose) of the description list elements enable them to be recognised by search engines and content management systems, which can then distinguish them from other types of data.
The judicious use of description lists can increase the overall usefulness of a web page by ensuring that the page content can be processed using automated methods (indeed, this applies to the correct usage of HTML markup in general, which should be appropriately structured for the context in which it appears).
The description list we saw in the example above has a very simple structure in which a single term is matched with a single description. In real life, as you are probably well aware, any given term may have multiple definitions. At the same time, several different terms can share the same definition. The structure of the description list is fairly flexible, and allows us to reflect real life by defining the following relationships:
We have already seen an example of a single term, single description version of the description list. The HTML code below demonstrates the use of the multiple terms, single description variant, the single term, multiple descriptions variant, and the multiple terms, multiple descriptions variant.
<!doctype html>
<html lang="en">
<head>
<meta charset="utf-8">
<title>List Demo 10</title>
</head>
<body>
<div style="text-align: center;">
<h1>Description List Structures</h1>
<div style="display: inline-block; text-align: left;">
<dl>
<dt><strong><em>Crane</em></strong></dt>
<dd><small>a tall wading bird (noun)</small></dd>
<dd><small>a machine for lifting heavy weights (noun)</small></dd>
<dd><small>to raise or lift something (verb)</small></dd>
<dd><small>to stretch your neck towards something (verb)</small></dd>
</dl>
<hr>
<dl>
<dt><strong><em>Film</em></strong></dt>
<dt><strong><em>Movie</em></strong></dt>
<dt><strong><em>Motion picture</em></strong></dt>
<dt><strong><em>Moving picture</em></strong></dt>
<dd><small>a series of still images that, when shown on a screen, create the illusion of moving images</small></dd>
</dl>
<hr>
<dl>
<dt><strong><em>Bucket</em></strong></dt>
<dt><strong><em>Pail</em></strong></dt>
<dd><small>an open-top container used to carry liquids</small></dd>
<dd><small>a vessel used to draw water (e.g. from a well)</small></dd>
<dd><small>a watertight open top container with a handle</small></dd>
<dd></dd>
</dl>
</div>
</div>
</body>
</html>
Copy and paste this code into a new file in your HTML editor, save the file as list-demo-10.html, and open the file in a web browser. You should see something like the following:
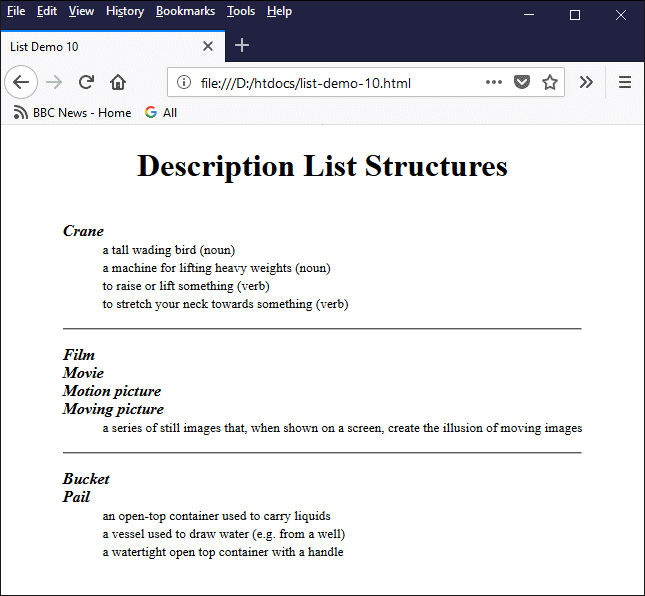
Decription lists can express different kinds of relationship between terms and descriptions